Introduction and Background
In the last post, I talked about many things that C# programmers usually look forward to in their IDEs and environment. If you didn’t read the previous post, please read it at Guide for building C# apps on Ubuntu: MonoProject Introduction. In that post, I talked about usual features and tools that C# developers want to use while working on their projects. In yet another post, I talked about using C# for cross-platform development and technically, that post had most of the content for C# programming on cross-platform environment, but in this post I am specifically talking about the Ubuntu environment only. You may want to read that post first, so head over to “Using C# for cross-platform development” and read that post too. I think you will find that post also very much helpful.
C# programming language has already become very popular in programmers, many beginners are taught C# for their object-oriented programming lessons. The concept of object-oriented is very intuitive and understandable, and praising the .NET, it has been made very easy and simple to program an entire object-oriented project in C# to run on any device having .NET framework installed on it.
In this post, I am going to talk about the language quick help toolkit provided in MonoDevelop environment. MonoDevelop has a great toolkit for C# language help in building the small snippets of code blocks in your programs.
Helpful tools and features in MonoDevelop
Let us count the helpful items and features provided in MonoDevelop. MonoDevelop has some great tools and features, available just for language guide and help while development, but however, we will only talk about a few of them in this section as discussing them all won’t be available in this one small post of mine and I will hopefully cover those topics in the book that I am going to write later. Make sure to check that book once it gets released.
1. Language specification
Sometimes, when you are working on a project, the specification for the language is a “must have” part in your “have this” setup! I have myself found it very hard to get the project running when I forget a single piece of code or how to write this and similar things. It just happens, and you have no control over it. However, usually tools do not come with the language specification and language references and guides. MonoDevelop and Mono Project however do come shipped with the language guide for you! You can get the offline version of their documentation on your machine so that you can reference it whenever you want to.
Mono Documentation is the application that contains the references to the technical part of the language, framework and the software platform itself.
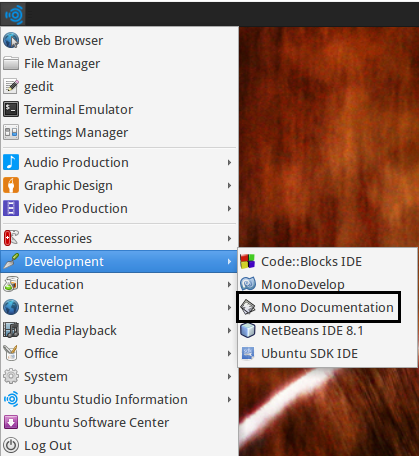
Figure 1: Mono Documentation application in the All Applications list on Ubuntu Studio.
Mono Documentation is an application package downloaded and installed while you are installing the Mono Project. This applications contains almost everything that you would ever need while programming a project on MonoDevelop IDE. The library tooling contains almost everything, a few of them can be enlisted as:
- Mono embedding
- JIT, Object, Reflection and other core features are listed and described here.
- Language
- Language references: Contains the language information, syntax and structures.
- Exceptions and errors: Compiler errors are also listed here so that you can search for one.
- Commands
- Some commands for the platform itself.
- Mono libraries
- Of course, Mono wouldn’t run without them! They are native Mono assemblies written to make sure that your .NET code runs on the Ubuntu.
You can use this guide, you can even update this guide because Mono Project is open source and relies on help from the community. Each contribution that you make, is pushed to others! “Sharing is caring“, right? 🙂
This is just a guide, so you are going to have the same one there. But I am just going to show you a few of the pages that you would find interesting and “much wanted”.
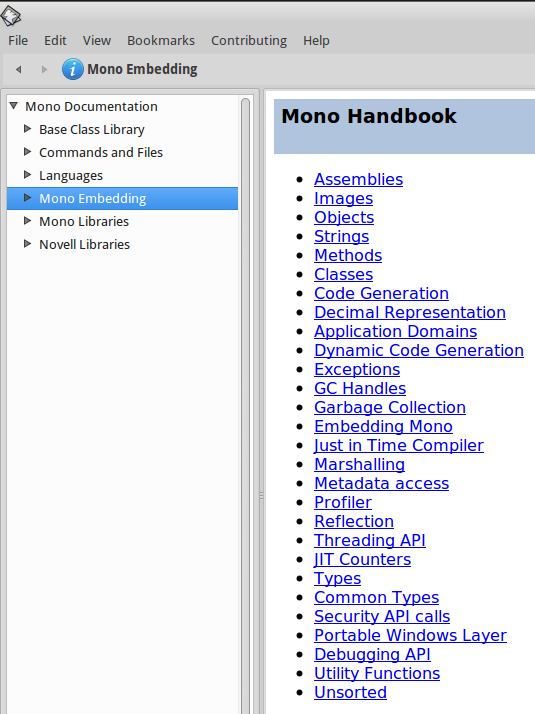
Figure 2: Mono Embedding window open in Mono Documentation.
These are core components and I would personally recommend that you read them out before using Mono Project for development. Having an understanding at core level is very helpful, even while programming C#!
Language specification can also be captured from this application, C# language has been greatly explained in this application. You will find the explanation for everything in C#, from objects, to strings, to classes to structs and to anything that you would find to learn about in C# and while programming an application.

Figure 3: C# language overview window opened in Mono Documentation.
However, posting an image and description of each of the page would go out of scope here and it would take a lot of time. I am not going to do that, you can surf that yourself.
2. Compile time error specification
Another main thing that C# programmers usually want to get is a compile time error specification. Of course, you can tell by the message, “Constant value 256 cannot be converted to byte“. But, the compiler error for this is, CS0031. For an intermediate programmer (like me!) that can be easily solvable, and maybe generated from the following code:
// Saving the value '256' to byte type.
byte b = 256;
We can solve that easily, by just changing the value to 255 (or less), or by changing the type to integer and so on. However, what in case when you need to get an example of the context when the errors are somewhat complex.
Remember, errors are thrown when you do not follow the rules defined when a compiler is designed and created. Compiler would always follow those rules, you need to stick to them. These documentations would have those rules defined. So, for example for our problem above, the sample error documentation is like below:
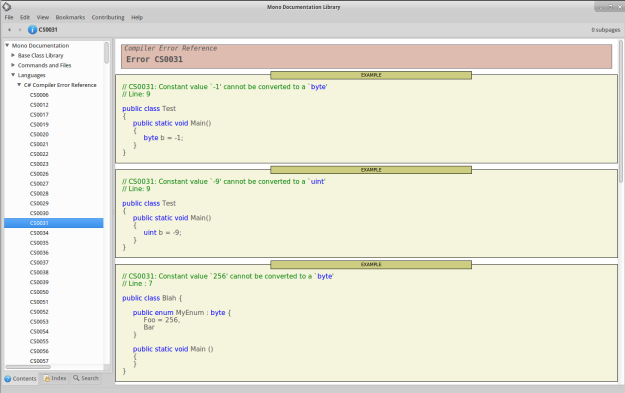
Figure 4: Compile-time error specification window open in Mono Documentation.
This page would contain many examples of the cases when you may raise this compile-time error. You can read this guide, learn what you did wrong and then solve the problem. Although most of the beginners want to ask questions, however that is not a good way of learning. At least, not in my case. I have always prefered learning by doing it wrong again. This way, I could get an idea of fixing my problems easily. This way would:
- Give you a better idea of compiler theory; not that subject, instead the way compiler is trying to compile the code.
- Show you other scenarios when the code goes wrong.
- Teach you how to fix the code.
- Give you a few other helpful resources in the code itself.
There are many other error codes discussed and shared about, you may want to find yourself some help and guidance in those guides. MSDN is a great resource for any C# programmer and you can surely find help by trying to Google for the problem and looking for an answer, but I find this method also very much helpful if you are a beginner and want to learn C# programming.
3. Toolbox support
If you have ever built applications for graphical user-interface, then you are already aware of the toolbox. A toolbox is an element that contains the most used controls ready for you to drag-and-drop or double-click to create in your application project’s currently open window. Now, what MonoDevelop has in it is that it also allows you to create code-snippets by double-clicking on the items in the toolbox. You don’t have to write the long codes yourself, you are provided with the templates for the code snippets and you can then allow MonoDevelop to create them up for you.
Just for the sake of example, have a look at this image below:

Figure 5: List of C# program structures provided in MonoDevelop Toolbox.
Now, if you have ever programmed in C#, you would know that these are all keywords and structures provided by C# to their programmers. You can chose from these and create a new structure at once. MonoDevelop would do the honor to write down the code for you.
For the sake of example, have a look at our class (this class was created in the previous post of this series, you should consider giving it a look), it doesn’t actually have a constructor so we will create a constructor using this toolbox.
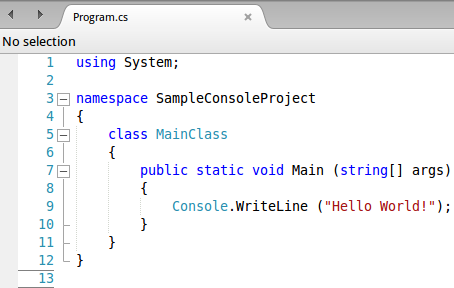
Figure 6: Class without a constructor.
Once we double-click the item from the Toolbox, (ctor is constructor), our class would now have the following code: (Remember to place the cursor where you want to enter this constructor, or any other code-snippet)
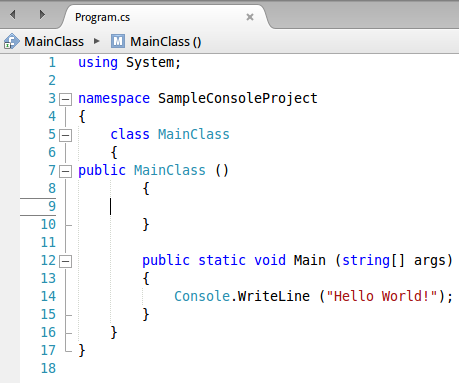
Figure 7: A sample constructor in our class.
It just added the constructor to the class… We can now refine it to look better or to add the logic that we want, MonoDevelop doesn’t know of the logic so it would just leave that to us. Maybe it is not intelligent enough. 🙂
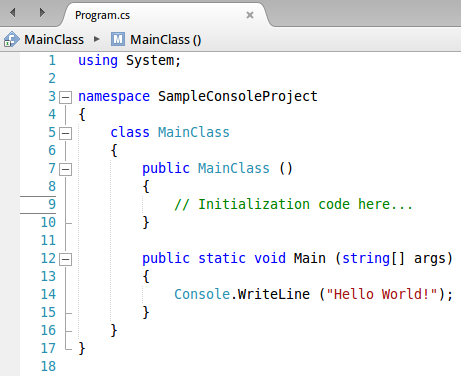
Figure 8: A sample constructor with a comment in it.
Looks better now, doesn’t it? There are many other methods, structures, loops and even class templates that you may want to try out. I have just demonstrated the basic one, and I leave the rest to you. Try them all.
4. Unsafe code in MonoDevelop
C# is a high-level language, agreed! But it does allow developers and programmers to go in an unsafe context and work around with pointers, references and other low-level stuff that C and C++ programmers usually brag about. Well, not anymore, MonoDevelop also supports unsafe context and they can use the power of low-level and “on-demand” memory-management!
By default that is not enabled, so if would like to write something like that,
unsafe {
   // Some "unsafe" code here...
}
You will get an error when you would try to compile the code.

Figure 9: Unsafe context code with error.
You can fix that in the settings for your project. Right under the general settings, select, “Allow unsafe” and you’re good to go then.
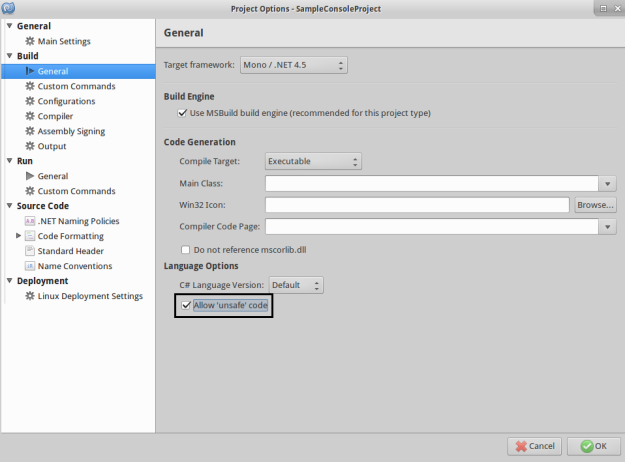
Figure 10: Allowing the unsafe context in MonoDevelop project configuration window.
The code would now execute and run successfully (unless there are other errors in the source code that you may want to fix first!).
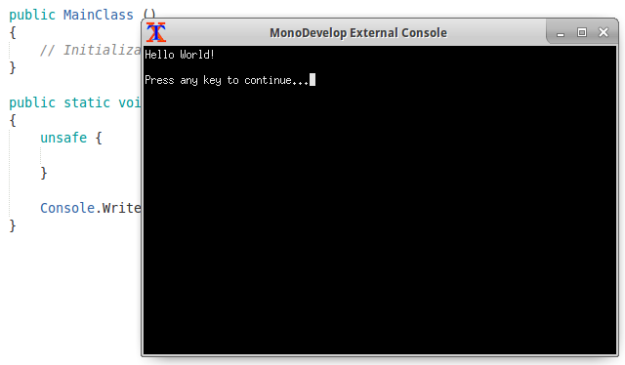
Figure 11: Unsafe context code compiled successfully and application runs. No code in unsafe context, just for demonstration.
Good to this point, I guess.
5. IntelliSense in MonoDevelop
Just a quick overview of IntelliSense in MonoDevelop for C# programmers. The IntelliSense feature is very friendly feature, in MonoDevelop for C# programmers as it helps them to:
- Write long codes, shortly.
- Provide suggestions based on current context and the APIs and references selected.
- Show errors and warnings.
- Show the list of constructors available to the developers and their description.
However, basically, IntelliSense works and shows the code API suggestions, like in the case of a Console.
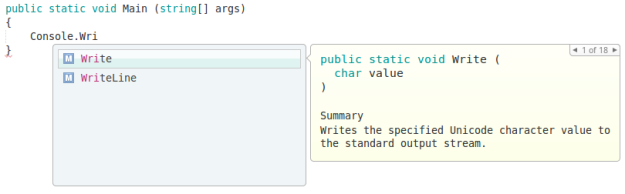
Figure 12: IntelliSense showing code suggestions plus the description of the suggested object (functions are also considered to be objects).
You can see how powerful this feature is. It suggests the programmers with the possible candidate for the function or object and also describes the object to them. Share the overloading of the functions and also gives a brief summary of the function. It is deemed helpful in many cases. However, most of you are already aware of these features in your own IDE as every IDE supports this feature.
Finally: A Visual Studio fan? Like me?
If you are a Visual Studio fan, then chances are that you are also not going to enjoy the default Linux look and feel of the IDE and the code structures. Trust me, I also didn’t like it and I wanted to change the look and feel of the code blocks at least because the code was really hard for me to read and understand.
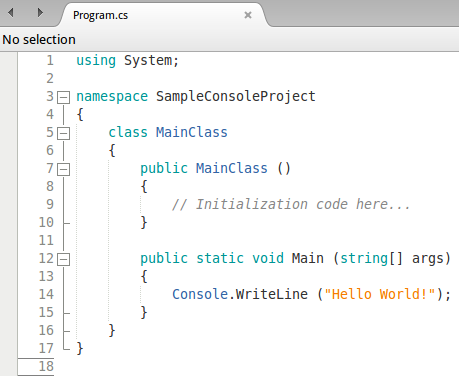
Figure 13: Default code and syntax highlighting in MonoDevelop.
You can edit the settings in the Preferences window. Find the Preferences window under Edit header and then chose the syntax highlighting.
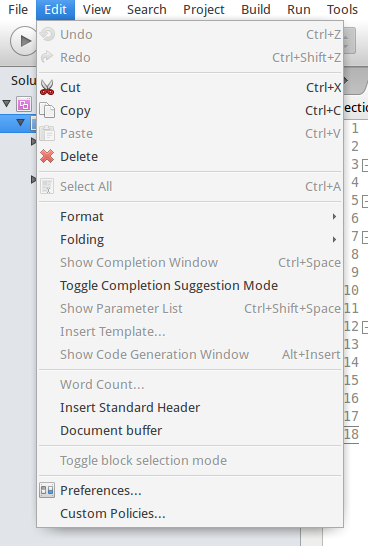
Figure 14: Opening up the Preferences in the Edit category.
You can then find the settings for the syntax highlighting and select Visual Studio there. That would set up the code and syntax highlighting as per Visual Studio look.
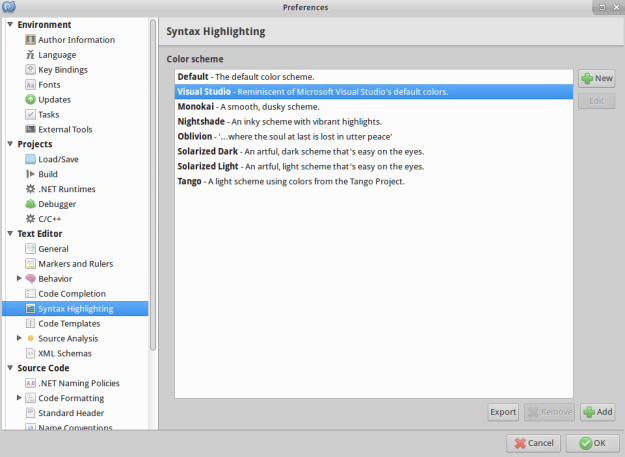
This would then change the theme and you would get the same syntax highlighting as you had in Visual Studio.
Points of Interest
Well, finally I finished up this post, in which I have covered the quick and helpful material for C# programmers in MonoDevelop. Actually, there are plenty of tools and services available to C# programmers in MonoDevelop but for this short guide, I am going to write a few of them and the ones that I find handy in many cases.
I will post a few other posts discussing the features of MonoDevelop for C# programmers, and however, I will also publish a book collective of all of these features and other tips for C# programmers, soon.
Do let me know what you think is missing, or what you think I shared and you didn’t know of. Looking forward to your replies. 🙂
