Tag Archives: web development

Automating deployment of ASP.NET Core to Azure App Service from Linux

Introduction and Background

On operating systems such as Microsoft Windows, and using great tools like Visual Studio, it is greatly easy to upload and publish your web application projects to Microsoft Azure but what about other platforms such as Linux? Microsoft has recently released PowerShell as open source project and that is a great tool to be used in the cases where you have developers who understand and can use PowerShell but if you don’t happen to have any, then you would require to use traditional tools and sometimes they will require you to manually perform these changes. In this post, I am going to cover the teams who are using Git repositories for their projects and I am going to cover how they can basically automate the publishing of their projects after each successful build. On Linux, we can basically create small scripts that run on the background just like PowerShell or the Windows command prompt terminal’s batch files. Git programs are required for this to run, actually what I am going to show in this is to execute the same commands but in a manner that most of the repository’s information is already built, the commit message is updated and the content is published to the Azure app service. The purpose of this guide is to make the entire process as easy to be understood, as A, B and C. I will be using a real world application to show you how to do what and where instead of talking generally about many things at the same time.

Before moving onward, a very little knowledge of how Git system works is required from you because some things might get a bit technical in the post below and thus you must have the know-how of how Git systems work in order to control the versioning of files.

2color-lightbg2x
Figure 1: Git logo.

Secondly, you are required to know how you can use “dotnet” script to create, build and run the .NET Core applications. If you don’t know .NET Core, I will reference to a few of my own articles that are beginner-friendly which you can read to learn more on this.

Finally, you are required to have an active Azure account with a working subscription. If you don’t happen to have on, you can get a free account with $200 credits to try out all of Azure! Once these are met, you can continue to actually using the article for something useful.

Creating the application — entire part

This part has been shared and taught many times, on many occasions. I wrote an article on the same concept, a few days ago and I would like to refer that article to you to learn how you can create a new application with web template in .NET Core. Creating and hosting ASP.NET Core application on Linux — Nothing Third-Party, read this article for a complete overview and a walkthough for the concept of building and running the applications on Linux environment. I will move onward from this step, because you must be aware of the ways of creating your own applications.

Deployment of web application to Azure

Now comes the main part, this article entirely focusses on the deployment of applications to Microsoft Azure instead of developing an application. There would be some parts, where I will be modifying the parts, but that is just to tell you how easy it would be to redeploy the application using the automation by executing a simple command. Although it is not required but you are required to have a very basic introduction to automation tools. You can get a good tutorial about these toolings easily from any software engineering guide.

Using git for deployment

Microsoft Azure uses many methods and ways to deploy the applications on the cloud, such as using Visual Studio to deploy the applications and leave the configurations to the tool itself. However, since Linux environments don’t have Visual Studio, most of the tasks are left with source control tools (Visual Studio Code also uses the same git programs to upload the code to repositories). I will show you, how you can create a minimal script or a program, that manages all of these tasks for you — automation program.

On Linux, mostly and typically, git comes pre installed in most of the Linux-distributions, such as Ubuntu, etc. However, if that is not available you get easily install it using

$ sudo apt-get install git

Or using a similar command, such as using yum etc. This would install and setup git for your environment. Once you have git installed, you need to set a few things up. Git requires the name, email address for notifying who made a change to the system. So for that we would require to execute the following commands,

$ git config --global user.name "Eminem"
$ git config --global user.email "email@domain.com"

You should pass the name and address values that you hold — I used Eminem and a random email address. And to check if your personal configurations are done correctly, you can execute the following command to test that,

$ git config --list

These are the required configurations that you must do before you can use git for any purpose at all.

Note: You also need to create a new web application service (Azure App Service) on Microsoft Azure so that you can deploy the application somewhere. Since I do not want to go deep into the development and starting of this session, I would like you guys to go and watch this video of mine, providing an overview of Microsoft Azure App Service (you may have to put the volume a bit higher).

Once you have that, you can continue onwards and actually set up repositories to deploy the application. I used the following information while creating a new service, so that if I use a name, you should know where did that come from.

screenshot-6477
Figure 2: Creating a new App Service.

screenshot-6478
Figure 3: Reviewing the information of App Service in Microsoft Azure.

Upon creating, you can visit the web service from your browser using the link provided and on the first visit without any update, the following page is shown.

screenshot-6479
Figure 4: Initial page from the App Service.

It shows that you can deploy your web applications, from many sources, using many services such as FTP, Git etc. I will show you, how to do this using Git… There are a few other things that I would like to show you here,

  1. I will show you how to do this, using git.
  2. I will also show you, how to test the build integrity — whether build succeeds or not.
  3. I will also show you, whether git considers to commit and push the changes to the server or not.

So these are a few of the tests that I have prepared for the automation tool that will be helpful for us in this case. These things are not provided on the tutorials that are available online, they are just simple straight-forward ones that only show you how to do it, not whether it is helpful to do it at all.

Setting up the local repository

On the machine side, the first thing to do is to set up a local repository for git deployments, even if you have created a project, you can still create a repository for that project and then use it as the source for your application’s content. So, for that, the following commands would work,

# If you have not created a project, remove these lines. 
$ dotnet new -t web
$ dotnet restore

# The following creates a local repository
$ git init

This would create the project, set up the repository for us under .git directory. On my machine, the following was the result of this,

screenshot-6480
Figure 5: Creating a new project using .NET Core.

Not visible at the moment, however there is a special file called .gitignore, created by default and that contains really helpful ignore constraints for the git systems. However, we will look into them later as we progress.

Adding remote repositories

We can now set up a few remote repositories on own local machine so that once we need to publish the application, we don’t have to enter the URL of the repository every time. Instead, what we can do is, just call that alias of the repository and deploy the content there. This helps to notify the system of the locations where it needs to push the changes to. For that, first of all we need to setup our online repository to allow Local Git Deployments from Microsoft Azure and only then we can assure that we can send the code to the repository online. For that, head over to, Deployment options → Deployment source → Local git repository.

screenshot-6487
Figure 6: Deployment options in Microsoft Azure.

You can see that there are other options available too, select as required and wanted. I selected the third option so that we can publish the source code from our local machines to the servers in no time at all, without having to require any third-party vendors. You need to set up the credentials, so that when you are trying to publish the applications, only you are the one in charge of pushing the changes to the server and not anyone else.

screenshot-6488
Figure 7: Setting up credentials for the deployment account.

Once these things are set up, we can then move onwards to set up our local git programs to allow it to deploy the source code from our local environment all the way up to the Microsoft Azure. Stay with me. To do so, we need to execute the following command,

$ git remote add repoinazure https://<user>@<servicename>.scm.azurewebsites.net:443/<servicename>.git

Note a few things in the previous command, the few things interesting here are that the repository always contains the name of your application service in the URL as well as in the resource file for your git processes. You need to update that, secondly, you need to update the username in the URL and as the one you used in the credentials (I used “afzaal” there). Once this is done, we can move onwards and actually push our first version of application to see, how Azure will behave.

The following commands take care of that,

$ git add .
$ git commit -m "Some random commit message here..."
$ git push repoinazure master

In the previous commands, the first one takes care of the addition of files to the local tracking of the repository, to track the files that needs to be. Second command simply commits the changes and finally a push is made to the “repoinazure”, of course that is the repository where we will publish the application to.

screenshot-6489
Figure 8: Terminal asking for password before deployment. 

It asks for the password and then continues to simply compress the objects, to deploy them using git protocol.

screenshot-6490
Figure 9: Terminal showing the progress. 

The following is a screenshot of a process going on, during the first deployment. Next times and onwards it doesn’t take this much time and is very much simpler.

screenshot-6491
Figure 10: Terminal showing the processes going on at Azure during the deployment.

However, we will also create a shell script that automates the deployment for us. Once it is done, the terminal will show the following results on the screen and we can know that Azure is set up for startup.

screenshot-6492
Figure 11: Application deployed to Azure.

Let us navigate to the website and see if things are the way we are planning them to be.

screenshot-6493
Figure 12: Application’s home page after it has been uploaded to Azure.

Voila! We have finally deployed the application to the Azure. We now need to deploy the changes and so here is where I submit my recommendations, ideas and tips.

Development and redeployments

Let us add a simple controller to this web application, and then quickly deploy that using the script that we will create to do the trick for us. In this section, I will show you a simple ASP.NET Core Web API that will be used to basically see, how early an updates get published live on the server. So, I start with adding a new controller file to the web application’s source code and then modifying it to return a few objects with some data.

using System.Collections.Generic;
using Microsoft.AspNetCore.Mvc;

namespace WebApplication.Controllers {

    [RouteAttribute("api/people")]
    public class PersonApiController : Controller {
        private List<Person> _people { get; set; } = new List<Person> { 
             new Person { ID = 1, Name = "Afzaal Ahmad Zeeshan" },
             new Person { ID = 2, Name = "Bruce Wayne" },
             new Person { ID = 3, Name = "Marshall Bruce Mathers III" } 
        };
        public List<Person> GetPeople() {
            return _people;
        }

        // Rest of the stuff here...
    }

    public class Person {
        public int ID { get; set; }
        public string Name { get; set; }
    }
}

I just added a simple HTTP GET handler to show you how easy and simple it is to actually make the changes to your live application using git deployment from a local repository.

Now the magic trick for kids, the following script will manage most of our tasks and will take care of them before we proceed deploying the application.

if [ $# == 0 ] 
    then 
    echo "Usage: automate.sh <git-remote-repository>"
    exit 1
fi

# Variables
commit_message="Deployment commit on $(date "+%B %dth, %Y at %H:%M %p")."

# Run the test
dotnet build

if [ $? == 0 ]
    then
        # Successful attempt.
        # Update the git.
        git add -A

        echo "Using commit message, \"$commit_message\"."
        git commit -m "$commit_message"
 
        # Check if anything was commited, or whether there were no changes.
        if [ $? == 0 ]
            then 
                # Files need to be updated
                # Update the azure's repository.
                echo "Connecting to server for git push..."
                git push $1 master
                exit 0
        else 
            echo "No changes to be pushed to server. Terminating."
            exit 1
        fi
        exit
    else 
        # There must have been an issue in the execution.
        echo "There were errors in building process, fix them and re-try."
        exit 1
fi

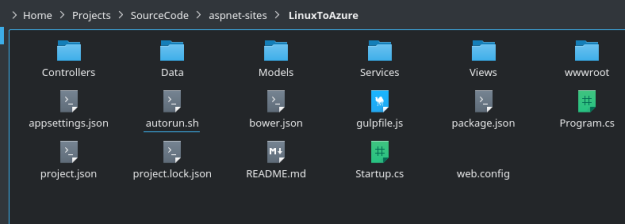
This would check if we are passing the remote repository or not, it will also build the project and then continue only if build succeeds. So, basically, this comes really handy when working with a terminal based environment especially Linux and using the git protocol for deployment. I recommend saving this as a file in your local repository, and then executing it from the terminal as a program. You can get the file from my GitHub repository too.

screenshot-6533
Figure 13: “autorun.sh” file available in the files.

Once this is done, simply create it executable and then finally execute the script to deploy it. It will go through each step and it will finally deploy the application, it would require password. I did not create the script to accept the password.

screenshot-6536
Figure 14: My script working and deploying the application to Azure.

So, let us run the system now. Once it is done, it will show you that you can now access the web application as it has been deployed successfully. Browser can confirm this,

screenshot-6539
Figure 15: Result of the deployment.

To see more information on this, we can head over to Azure to see how does the deployment affect our current source code.

screenshot-6538
Figure 16: Deployments shown on the Azure.

Clearly seen that now our most recent version of the deployment is being shown as the active deployment and the previous one is removed and set as Inactive. We can do deeper into them and change their status as needed but I won’t be doing that at all. Remember: Next time you want to publish the application, just use that script I provided.

Final words

Microsoft Azure provides very simple ways of deploying the applications, there are many other ways other than Git to deploy the applications to the server. OneDrive, GitHub and other cloud storage services can be used easily to deploy the applications.

However my major concern was to show how you can use the git, in a script-based environment to deploy the applications to Azure and also track when each commit gets pushed to the server. As you can see in this post, the commits are tracked on the cloud and you can change and select which commit you are interested in and set them as the active ones — such as in the case of a deletion of a file or so.

Creating and hosting ASP.NET Core application on Linux — Nothing Third-Party

Introduction and Background

It has been a while since I wanted to write something about ASP.NET Core hosting stuff, and Kestrel was something that was interesting from my own perspective. Previously I have written a bunch of stuff to cover up the basics of ASP.NET Core programming and in this one I will guide you on hosting the ASP.NET Core application natively, using the .NET Core libraries that you download while installation process. Secondly, it has been a while since I have had written anything at all and I might have forgotten the interests of my readers so excuse me if I miss out a few things.

image_60140ec0-ce46-4dbf-a14f-4210eab7f42c
Figure 1: Image captured from Scott Hanselman’s blog.

There is a lot of stuff to share in this post today, so stay tuned and hold your breath basically. I will be covering the following steps in this article:

  1. Installation of the latest version of .NET Core on Linux environment
    • If you already have a .NET Core framework installed, upgrade your system if that doesn’t support ASP.NET programming as of now.
    • In the previous versions, web development wasn’t support in .NET Core for Linux operating systems. In the recent versions, it has been added to the recent versions now so that is why I insist that before continuing you at least install the latest version of .NET Core.
  2. Setup an ASP.NET Web Application in your Linux environment.
    • I will guide you through many stages, such as development, editing, maintenance and using an IDE for all of these things.
    • I will walk you through many different areas (not the ASP.NET Area!) in ASP.NET web application’s file hierarchy, plus I will tell you what is back and what is about to change (or subject to change in the hierarchy).
  3. Build and run the project
    • In this section, I will guide you through a few of the tips that would deem helpful to you.
    • Before running, I will give you an overview of Kestrel — web server for ASP.NET 5.
    • I will then move onwards to using the website, which has the same feel as it had in Windows operating system, while developing ASP.NET web applications.
    • Tip: I will then give you a tip, by default, application is uploaded at 5000 port, which you would require to change in many cases, I will show you how to change the port of the web application’s hosting service.
  4. Finally, I will head over to final words that I put at the end of every post that I write on any of the platform that I have to write about.

Installing or upgrading .NET Core

I wrote an article that covered how you can start using .NET Core on Linux environments, you can read it here. That article was written entirely, to give you a concept of the .NET Core architecture, and a few commands that you can use to do most of the stuff. The only difference between the older article and this section of the post is that this would just contain a later version of .NET Core to be installed on the system. Whereas in the previous one you had to install the older one.

Try the following,

sudo apt-get update && dist-upgrade

If that doesn’t work, or it doesn’t show the updates, head over to the main website for .NET Core, and install the latest version from there.

Creating a new web application

Previously, .NET Core only supported creating libraries or console applications. At the moment, it supports ASP.NET web application development too, it supports the templates for ASP.NET too, at the moment just a simple ASP.NET MVC oriented web application is created, and I don’t think there is any need for other templates like Web API, SignalR, single page applications etc. I believe that is complete at the moment.

To create a new web application, create the new project in .NET Core and pass the type parameter as a web application, which would guide .NET Core (dotnet) to create a new application with the template of web application.

screenshot-3007
Figure 2: Creation of a new .NET Core project using web template. 

As you can see in the command above, we are passing a type (-t parameter) to the command to create a new web templated application. The content is as following,

screenshot-3008
Figure 3: ASP.NET Web application files and directories in .NET Core. 

The project looks similar to what we have on Windows environment. Just a difference of one thing: It includes, web.config as well as project.json file. Remember that Microsoft is mostly moving back to MSBuild and of course a few of the hosting modules are based on IIS servers so that is why web.config file is available in the project. However, the project at the moment uses project.json file for project-level configuration and (as we have heard mostly during these days) these would be migrated to MSBuild way of managing the project and other related stuff.

Editing and updating the web application

Microsoft has been pushing the limits since a while, of course on Linux you already had a few of the best tools for development but Visual Studio Code is still a better tool. In my previous posts, I said that I don’t like it enough — I still don’t like it very much, it needs work! — but it is better than many tools and IDEs available for C# or .NET-related programming. Since in this post I said that I won’t be talking about anything third-party, so Visual Studio Code is the tool that I am going to suggest, support and use in this case.

You can install Visual Studio Code from their official website, note one thing, the Debian packages take a little longer for installation, so if you also don’t like to wait too much like me then I would recommend that you download the archive packages and install the IDE from them. There is no installation required at all, you just move the extracted files to a location where you want to store it. FInally, you create a symbolic link to your executable, which can be done like this,

sudo ls -s /home/username/Downloads/VSCode-linux-x64/code /usr/local/bin/code

This would create link and you can use Visual Studio Code IDE just by executing this “code” command anywhere in the directory (using the terminal), it would then load the directory itself as a project in the IDE which you can then use to update your application’s source code and other stuff that you want to.

Tip: Install the C# extension from market place for a greater experience.

Once this is done, head over to the directory where you create the project. Execute the following command,

code .

This would trigger Visual Studio Code to load your directory as the project in the IDE. This is how my environment looks like,

screenshot-3009
Figure 4: Visual Studio Code showing the default ASP.NET directory as a project.

The rest is history — I mean the rest is the similar effect, and feeling that you can get on Windows environment. First of all, when you work this way and follow my lead you will get the following errors in the IDE window.

screenshot-3010
Figure 5: Error messages in Visual Studio Code.

We will fix them in a moment. But at first, understand that these are meant to act like this. If you have had ever programmed in .NET Core, you must have known that before anything else you need to restore the NuGet packages for your project before even building the project. Visual Studio Code uses the same IntelliSense and tries to tell you what is going wrong. In doing so, it requires the binaries which are not available so you are shown that last error message. Above two are optional, middle one is a bit optional-required.

Build and run the project

Until this point we have had created the project. But now we need to restore the dependencies for our project which are going to be used by the .NET Core to actually execute our code. By default a lock file is not generated, so we need to create a new file and after that we would be able to build the project.

Execute the following command,

dotnet restore

After this, .NET Core would automatically generate the lock file and building process can be easily triggered.

screenshot-3012
Figure 6: Project.lock.json file created after restoring the project.

We can continue to building the project. I want you to pay attention to this point now. See what happens.

screenshot-3013
Figure 7: Build and run process of ASP.NET web application on .NET Core.

Now notice a few things in the above terminal window. First of all, notice that it keeps logging everything. Secondly, notice that it has a port “5000” appended. We didn’t train it to use that at all, and that also didn’t come from Program.cs file either (you can see that file!). But before I dig any deeper in explanation of how to change that, I want you to praise KestrelThe web server of ASP.NET 5. Kestrel is the implementation of libuv async I/O library that helps hosting the ASP.NET applications in a cross-platform environment. The documentation for kestrel and the reference documentation is also available, and you can get started reading most of the documentation about Kestrel, on the namespace Microsoft.AspNetCore.Server.Kestrel at the ASP.NET Core reference documentation website.

This is the interesting part because ASP.NET Core can run even on a minimal HTTP listener that can act as a web server. Kestrel is a new web server, it isn’t a full feature web server but adapts as community needs updates. it supports HTTP/1 only as of now but would support other features in the coming days. But remember, pushing every single feature and module in one server would actually kill the major purpose of using the .NET Core itself. .NET Core isn’t developed to push everything on the stack, but instead it is developed to use only the modules and features that are required.  Yes, if you want to add a feature you can update the code and build the service yourself. It is open sourced on GitHub.

Changing the port number of application

In many cases, you might want to change the port number where your server listens or you may also want to make this server the default server for all of your HTTP based communication on the network. In such cases, you must be having a special port number assigned (80-for default).

For that, head over to your Program.cs file, that is the main program file (main function of your project), and that is responsible for creating a hosting wrapper for your web application in ASP.NET Core environment. The current content for this object is,

screenshot-3015
Figure 8: Source code for the Program.cs file.

In that chain of “Use” functions, we just need to add one more function call to use a special URL. The function of “UseUrls(“”)” would allow us to update the URLs that are to be used for this web application. So I am just going to use that function here so that it would let us simply select which URL (and port) to use.

screenshot-3017
FIgure 9: URLs being managed.

Now, if you try to run the application you will run into the following problem in Linux-based system.

screenshot-3019
Figure 10: Unable to bind to the URL given, error message.

That is pretty much simple — it doesn’t have permission to do the trick. So what on Linux systems is done is that it simply is performed using the superuser credentials and account.

sudo dotnet run

It would prompt you for your password, enter your password and this time application would run on the localhost:80. In the cases where you have to upload the website to the servers, Azure App Services etc. In these cases, you are requires to have the application running under the server that acts as the default server, so in those cases you must handle the default TCP port for HTTP communication for the requests. Otherwise, you might require to work at the backends of NGINX or Apache servers etc. But that is a different story.

screenshot-3020
Figure 11: Web server running at port 80.

Now that our server is running, we can now go to a web browser to test it out. I am going to use Firefox, you can use any web browser (even a terminal-based).

screenshot-3021
Figure 12: ASP.NET Core web application being rendered in Firefox, running in Linux using Kestrel web server.

As you can see, the web application runs smoothly. Plus, it also logs any event that takes place. The terminal keeps a record of that, it can also allow you to actually transfer the output from main terminal’s output to a file stream to store everything. But that is a topic for a different post.

screenshot-3022
Figure 13: ASP.NET web application’s log in terminal window.

As requests come and responses are generated, this window will have more and more content.

Final words

I have wanted since a while, to write my own next web application for my own blog and stuff, in ASP.NET Core. At the moment, the framework is “almost” ready for production, but just not yet. Maybe in a couple of next builds it will be ready. There are many things that they need to look into. For example, the web server needs to be more agile — the features needs to be provided. That is not it, VIsual Studio Code must be fully integrated with ASP.NET Core tooling. At the moment it just allows us to edit the code, then we have to go back to the terminal to do the rest. It should provide us with the ability to do that.

To Microsoft’s team related to .NET Core: Why isn’t .NET Core being published on Linux? I am pretty much sure the framework is fully function, despite the bugs. But there are bugs in the main .NET framework too, there are some minor issues every here and there. My major concern here is to be able to do, “sudo apt-get install dotnet”. I can’t remember the longer version names.

To readers: If you are willing to use ASP.NET Core for your production applications, wait for a while. Althought ASP.NET Core is a better solution than many other solutions available. But my own recommendation is to stick to ASP.NET 4.6 as of now because that is more stable version as compared to this one.

Highlighting the faces in uploaded image in ASP.NET web applications

Introduction and Background

Previously, I was thinking we can find the faces in the uploaded image, so why not create a small module that automatically finds the faces and renders them when we want to load the images on our web pages. That was a pretty easy task but I would love to share what and how I did it. The entire procedure may look a bit complex, but trust me it is really very simple and straight-forward. However, you may be required to know about a few framework forehand as I won’t be covering most of the in-depth stuff of that scenario — such as computer vision, which is used to perform actions such as face detection.

In this post, you will learn the basics of many things that range from:

  1. Performing computer vision operations — most basic one, finding the faces in the images.
  2. Sending and receiving content from the web server based on the image data uploaded.
  3. Using the canvas HTML element to render the results.

I won’t be guiding you throughout each and everything of the computer vision, or the processes that are required to perform the facial detection in the images, for that i would like to ask you to go and read this post of mine, Facial biometric authentication on your connected devices. In this post, I’ll cover the basics of how to detect the faces in ASP.NET web application, how to pass the characters of the faces in the images, how to use those properties and to render the faces on the image in the canvas.

Making the web app face-aware

There are two steps that we need to perform in order to make our web applications face aware and to determine whether there is a face in the images that are to be uploaded or not. There are many uses, and I will enlist a few of them in the final words section below. The first step is to configure our web application to be able to consume the image and then render the image for processing. Our image processing toolkit would allow us to find the faces, and the locations of our faces. This part would then forward the request to the client-side, where our client itself would render the face locations on the images.

In this sample, I am going to use a canvas element to draw objects, whereas this can be done using multiple div containers to contain span elements and they can be rendered over the actual image to show the face boxes with their positions set to absolute.

First of all, let us program the ASP.NET web application to get the image, process the image, find the faces and generate the response to be collected on the client-side.

Programming file processing part

On the server-side, we would preferably use the Emgu CV library. This library has been of a great usage in the C# wrappers list of OpenCV library. I will be using the same library, to program the face detectors in ASP.NET. The benefits are:

  1. It is a very light-weight library.
  2. The entire processing can take less than a second or two, and the views would be generated in a second later.
  3. It is better than most of other computer vision libraries; as it is based on OpenCV.

First of all, we would need to create a new controller in our web application that would handle the requests for this purpose, we would later add the POST method handler to the controller action to upload and process the image. You can create any controller, I used the name, “FindFacesController” for this controller in my own application. To create a new Controller, follow: Right click Controllers folder → Select Add → Select Controller…, to add a new controller. Add the name to it as you like and then proceed. By default, this controller is given an action, Index and a folder with the same name is created in the Views folder. First of all, open the Views folder to add the HTML content for which we would later write the backend part. In this example project, we need to use an HTML form, where users would be able to upload the files to the servers for processing.

The following HTML snippet would do this,

<form method="post" enctype="multipart/form-data" id="form">
  <input type="file" name="image" id="image" onchange="this.form.submit()" />
</form>

You can see that this HTML form is enough in itself. There is a special event handler attached to this input element, which would cause the form to automatically submit once the user selects the image. That is because we only want to process one image at a time. I could have written a standalone function, but that would have made no sense and this inline function call is a better way to do this.

Now for the ASP.NET part, I will be using the HttpMethod property of the Request to determine if the request was to upload the image or to just load the page.

if(Request.HttpMethod == "POST") {
   // Image upload code here.
}

Now before I actually write the code I want to show and explain what we want to do in this example. The steps to be performed are as below:

  1. We need to save the image that was uploaded in the request.
  2. We would then get the file that was uploaded, and process that image using Emgu CV.
  3. We would get the locations of the faces in the image and then serialize them to JSON string using Json.NET library.
  4. Later part would be taken care of on the client-side using JavaScript code.

Before I actually write the code, let me first show you the helper objects that I had created. I needed two helper objects, one for storing the location of the faces and other to perform the facial detection in the images.

public class Location
{
    public double X { get; set; }
    public double Y { get; set; }
    public double Width { get; set; }
    public double Height { get; set; }
}

// Face detector helper object
public class FaceDetector
{
    public static List<Rectangle> DetectFaces(Mat image)
    {
        List<Rectangle> faces = new List<Rectangle>();
        var facesCascade = HttpContext.Current.Server.MapPath("~/haarcascade_frontalface_default.xml");
        using (CascadeClassifier face = new CascadeClassifier(facesCascade))
        {
            using (UMat ugray = new UMat())
            {
                CvInvoke.CvtColor(image, ugray, Emgu.CV.CvEnum.ColorConversion.Bgr2Gray);

                //normalizes brightness and increases contrast of the image
                CvInvoke.EqualizeHist(ugray, ugray);

                //Detect the faces from the gray scale image and store the locations as rectangle
                //The first dimensional is the channel
                //The second dimension is the index of the rectangle in the specific channel
                Rectangle[] facesDetected = face.DetectMultiScale(
                                                ugray,
                                                1.1,
                                                10,
                                                new Size(20, 20));

                faces.AddRange(facesDetected);
            }
        }
        return faces;
    }
}

These two objects would be used, one for the processing and other for the client-side code to render the boxes on the faces. The action code that I used for this is as below:

public ActionResult Index()
{
    if (Request.HttpMethod == "POST")
    {
         ViewBag.ImageProcessed = true;
         // Try to process the image.
         if (Request.Files.Count > 0)
         {
             // There will be just one file.
             var file = Request.Files[0];

             var fileName = Guid.NewGuid().ToString() + ".jpg";
             file.SaveAs(Server.MapPath("~/Images/" + fileName));

             // Load the saved image, for native processing using Emgu CV.
             var bitmap = new Bitmap(Server.MapPath("~/Images/" + fileName));

             var faces = FaceDetector.DetectFaces(new Image<Bgr, byte>(bitmap).Mat);

             // If faces where found.
             if (faces.Count > 0)
             {
                 ViewBag.FacesDetected = true;
                 ViewBag.FaceCount = faces.Count;

                 var positions = new List<Location>();
                 foreach (var face in faces)
                 {
                     // Add the positions.
                     positions.Add(new Location
                     {
                          X = face.X,
                          Y = face.Y,
                          Width = face.Width,
                          Height = face.Height
                     });
                 }

                 ViewBag.FacePositions = JsonConvert.SerializeObject(positions);
            }

            ViewBag.ImageUrl = fileName;
        }
    }
    return View();
}

The code above does entire processing of the images that we upload to the server. This code is responsible for processing the images, finding and detecting the faces and then returning the results for the views to be rendered in HTML.

Programming client-side canvas elements

You can create a sense of opening a modal popup to show the faces in the images. I used the canvas element on the page itself, because I just wanted to demonstrate the usage of this coding technique. As we have seen, the controller action would generate a few ViewBag properties that we can later use in the HTML content to render the results based on our previous actions.

The View content is as following,

@if (ViewBag.ImageProcessed == true)
{
    // Show the image.
    if (ViewBag.FacesDetected == true)
    {
        // Show the image here.
        <img src="~/Images/@ViewBag.ImageUrl" alt="Image" id="imageElement" style="display: none; height: 0; width: 0;" />

        <p><b>@ViewBag.FaceCount</b> @if (ViewBag.FaceCount == 1) { <text><b>face</b> was</text> } else { <text><b>faces</b> were</text> } detected in the following image.</p>
        <p>A <code>canvas</code> element is being used to render the image and then rectangles are being drawn on the top of that canvas to highlight the faces in the image.</p>

        <canvas id="faceCanvas"></canvas>

        <!-- HTML content has been loaded, run the script now. -->
        
            // Get the canvas.
            var canvas = document.getElementById("faceCanvas");
            var img = document.getElementById("imageElement");
            canvas.height = img.height;
            canvas.width = img.width;

            var myCanvas = canvas.getContext("2d");
            myCanvas.drawImage(img, 0, 0);

            @if(ViewBag.ImageProcessed == true && ViewBag.FacesDetected == true)
            {
            
            img.style.display = "none";
            var facesFound = true;
            var facePositions = JSON.parse(JSON.stringify(@Html.Raw(ViewBag.FacePositions)));
            
            }

            if(facesFound) {
                // Move forward.
                for (face in facePositions) {
                    // Draw the face.
                    myCanvas.lineWidth = 2;
                    myCanvas.strokeStyle = selectColor(face);

                    console.log(selectColor(face));
                    myCanvas.strokeRect(
                                 facePositions[face]["X"],
                                 facePositions[face]["Y"],
                                 facePositions[face]["Width"],
                                 facePositions[face]["Height"]
                             );
               }
           }

           function selectColor(iteration) {
               if (iteration == 0) { iteration = Math.floor(Math.random()); }

               var step = 42.5;
               var randomNumber = Math.floor(Math.random() * 3);

               // Select the colors.
               var red = Math.floor((step * iteration * Math.floor(Math.random() * 3)) % 255);
               var green = Math.floor((step * iteration * Math.floor(Math.random() * 3)) % 255);
               var blue = Math.floor((step * iteration * Math.floor(Math.random() * 3)) % 255);

               // Change the values of rgb, randomly.
               switch (randomNumber) {
                   case 0: red = 0; break;
                   case 1: green = 0; break;
                   case 2: blue = 0; break;
               }

               // Return the string.
               var rgbString = "rgb(" + red + ", " + green + " ," + blue + ")";
               return rgbString;
           }
        
    }
    else
    {
        <p>No faces were found in the following image.</p>

        // Show the image here.
        <img src="~/Images/@ViewBag.ImageUrl" alt="Image" id="imageElement" />
    }
}

This code is the client-side code and would be executed only if there is an upload of image previously. Now let us review what our application is capable of doing at the moment.

Running the application for testing

Since we have developed the application, now it is time that we actually run the application to see if that works as expected. The following are the results generated of multiple images that were passed to the server.

Screenshot (427)

The above image shows the default HTML page that is shown to the users when they visit the page for the first time. Then they will upload the image, and application would process the content of the image that was uploaded. Following images show the results of those images.

Screenshot (428)

I uploaded my image, it found my face and as shown above in bold text, “1 face was detected…”. It also renders the box around the area where the face was detected.

Screenshot (429)

Article would have never been complete, without Eminem being a part of it! 🙂 Love this guy.

Screenshot (426)

Secondly, I wanted to show how this application processed multiple faces. On the top, see that it shows “5 faces were detected…” and it renders 5 boxes around the areas where faces were detected. I also seem to like the photo, as I am a fan of Batman myself.

Screenshot (430)

This image shows what happens if the image does not contain a detected face (by detected, there are many possibilities where a face might not be detected, such as having hairs, wearing glasses etc.) In this image I just used the three logos of companies and the system told me there were no faces in the image. It also rendered the image, but no boxes were made since there were no faces in the image.

Final words

This was it for this post. This method is useful in many facial detection software applications, many areas where you want the users to upload a photo of their faces, not just some photo of a scenery etc. This is an ASP,NET web application project, which means that you can use this code in your own web applications too. The library usage is also very simple and straight-forward as you have already seen in the article above.

There are other uses, such as in the cases where you want to perform analysis of peoples’ faces to detect their emotions, locations and other parameters. You can first of all perform this action to determine if there are faces in the images or not.

From zero to hero in JSON with C#

Introduction and Background

I have been reading many posts and articles about JSON and C# where every article tries to clarify the purpose of either one thing, or the other thing: JSON or C# libraries. I want to cover both of these technologies in one post so that if you have no idea of JavaScript Object Notation (JSON), and the C# libraries available for processing and parsing the JSON files you can understand these two concepts fully. I will try my best to explain each and every concept in these two frameworks and I will also try to publish the article on C# Corner and to share an offline copy of this post as an eBook, so excuse me if you find me sliding through different writing formats because I have to stick to both writing styles in order to qualify this post as an article and as a miniature guide.

When I started to do a bit of programming, I knew there were many data-interchange formats, serialization and deserialization techniques and how objects can be stored including their states in the disk to fetch the same data back for further processing and further working on the same objects that you just left while you were going outside. Some of these techniques are tough to be handled and understood while others are pretty much framework-oriented. Then comes JSON into the image, JSON provides you with a very familiar and simple interface for programming the serialization and deserialization of the objects on runtime so that their states can be stored for later use. And we are going to study JSON notation of data-interchange and how we can use this format in C# projects for our applications.

What is JSON?

I remember when I was starting to learn programming there was this something called, Extensible markup language, or as some of us know it as, XML. XML was used to convert the runtime data of the objects or the program states or the configuration settings into a storable string notation. These strings were human-readable. Programmers could even modify these values when they needed to, added more values or removed the values they didn’t want to see in the data.

Introduction of XML

For a really long time and even today, XML is being used as the format for data-interchange. Many protocols for communication are built on the top of XML, most notably SOAP protocol. XML didn’t even power a few of the protocols, it even kick-started many of the most widely known and used markup languages, of which HTML and XAML are the ones that most of you are already familiar with.

xml-file
Figure 1: XML file icon.

History has it, XML has been of a great use to many programmers for building applications that share the data across multiple machines. The world wide web started with the pages written in a much XML-oriented way, markup language called, HTML.

The purpose of XML entirely was to design the documents in plain-text that can be human-readable and can be used by the machines to define the state of applications, program or interfaces.

  1. State of applications: You can store the object states, which can be loaded later for further processing of the data. This would allow you to maintain the states of the applications too.
  2. Program: XML can be used to define the configuration of the programs when they start up. Microsoft has been using web.config and machine.config files to define how a program would start. Programmers and developers can easily modify the files as they needed them to. This would alter the design of the way program starts.
  3. Interfaces: HTML is being used to define how the user-interface would look like. Windows Presentation Foundation uses XAML as the major language for designing the interfaces. Android supports XML-based markup language for defining the UI controls.
<?xml version="1.0" encoding="UTF-8"?>

Empty XML documents are not meant to contain any blank object or document tree. They can be omitted.

This is not it. XML is much more than this, WCF, for example supports SOAP communication. Which means that you can download and upload the data in XML format. ASP.NET Web API supports data transfer in the form of XML documents.

Usage of XML

I want to show you how XML is used, then why shouldn’t I used something that comes from a real-world example. RSS for example, uses XML-based documents for delivery of feeds to the clients. I am using the same technology feature on my blog to deliver the blog posts to readers and other communities. The basic XML document for a single post would look like this,

<?xml version="1.0" encoding="UTF-8"?>
<rss version="2.0"
    xmlns:atom="http://www.w3.org/2005/Atom"
    xmlns:media="http://search.yahoo.com/mrss/">

<channel>
    <title>Learn the basics of the Web and App Development</title>
    <atom:link href="https://basicsofwebdevelopment.wordpress.com/feed/" rel="self" type="application/rss+xml" /> 
    <link>https://basicsofwebdevelopment.wordpress.com</link>
    <description>The basics about the Web Standards will be posted on my blog. Love it? Share it! Found an error, ask me to edit the post! :)</description>
    <lastBuildDate>Fri, 03 Jun 2016 09:48:29 +0000</lastBuildDate>
    <language>en</language>
    <generator>http://wordpress.com/</generator>
    <cloud domain='basicsofwebdevelopment.wordpress.com' port='80' path='/?rsscloud=notify' registerProcedure='' protocol='http-post' />
    <image>
         <url>https://s2.wp.com/i/buttonw-com.png</url>
         <title>Learn the basics of the Web and App Development</title>
         <link>https://basicsofwebdevelopment.wordpress.com</link>
    </image>
    <atom:link rel="search" type="application/opensearchdescription+xml" href="https://basicsofwebdevelopment.wordpress.com/osd.xml" title="Learn the basics of the Web and App Development" />
    <atom:link rel='hub' href='https://basicsofwebdevelopment.wordpress.com/?pushpress=hub'/>
    <item>
        <title>Hashing passwords in .NET Core with tips</title>
        <link>https://basicsofwebdevelopment.wordpress.com/2016/06/03/hashing-passwords-in-net-core-with-tips/</link>
        <comments>https://basicsofwebdevelopment.wordpress.com/2016/06/03/hashing-passwords-in-net-core-with-tips/#respond</comments>
        <pubDate>Fri, 03 Jun 2016 08:42:49 +0000</pubDate>
        <dc:creator><![CDATA[Afzaal Ahmad Zeeshan]]></dc:creator>
        <category><![CDATA[Beginners]]></category>
        <category><![CDATA[C# (C-Sharp)]]></category>
        <guid isPermaLink="false">https://basicsofwebdevelopment.wordpress.com/?p=1313</guid>
        <description>
            <![CDATA[Previously I had written a few stuff for .NET framework and how to implement basic security concepts on your applications that are working in .NET environment. In this post I want to walk you to implement the same security concepts in your applications that are based on the .NET Core framework. As always there will be […]<img alt="" border="0" src="https://pixel.wp.com/b.gif?host=basicsofwebdevelopment.wordpress.com&blog=59372306&post=1313&subd=basicsofwebdevelopment&ref=&feed=1" width="1" height="1" />]]>
        </description>
    </item>
</channel>
</rss>

Of course I snipped out most of the part, but you get the point of XML here. This data can be read by humans themselves, and if the machine is set to parse this data it can provide us with runtime association of data with the objects. In a much similar manner, we can share the data from one machine to another by serializing and deserializing the objects.

What is the need of JSON, then?

JSON comes into the frame back in 1996 or around that time. The purpose of XML and JSON is similar: Data-interchange among multiple devices, networks and applications. However, the language syntax is very much similar to what C, C++, Java and C# programmers have been using for their regular day “object-oriented programming“; pardon me C programmers. The language syntax is very similar to what JavaScript uses for the notation of objects. JSON provides a much compact format for the documents for storing the data. JSON data, as we will see in this guide, is much shorter as compared to XML and in many ways can be (and should be…) used on the network-based applications where each byte can be a bottleneck to your application’s performance and efficiency. I wanted to take this time to disgust XML, but I think your mind will consider my words as personal and bias views. So, first I will talk about JSON itself how it is structured and then I will talk about using the time to show the difference between JSON and XML and which one to prefer.

JSON format and specifications were shared publicly as per ECMA-404. The document guides the developers to find their APIs in such a way that they work as per the teachings of the standard. API developers, programmers, serialization/deserialization software developers can get much help from the documentation in understanding how to define their programs to parse and stringify the JSON content.

Structure of JSON

JSON is an open-standards document format for human-readable and machine-understandable serialization and deserialization of data. Simply, it is used for data-interchange. The benefit of JSON is that it has a very compact size as compared to XML documents of the same purpose and data. JSON stores the data in the form of key/value pairs. Another benefit of JSON is (just like XML) it is language-independent. You can work with JSON data in almost any programming language that can handle string objects. Almost every programming framework that I can think of most of the programming frameworks support JSON-based data-interchange. For example, ASP.NET Web API supports JSON format data transfer to-and-from the server.

The basic structure of JSON document is very much simple. Every document in JSON must have either an object at its root, or an array. Object and array can be empty there is no need for it to contain anything in it, but there must be an object or an array.

A sample, and simple JSON document can be the following one:

{ }

What that means, is something that I am going to get into a bit later. At the moment just understand that this is a blank JSON document about any object in the application. A JSON document can contain other data in the form of key/value pairs, that are of the following types:

  1. Object
  2. Array
  3. String; name or character.
  4. Integer; numeric
  5. Boolean; true or false
  6. Null.

Note that JSON doesn’t support all of the JavaScript keywords, such as you cannot use “undefined” in a valid JSON schema. Nothing is going to stop you from using it in your files, but remember that valid JSON schema should not include such values. One more thing to consider is that JSON is not executable file, although it shares the same object notation but it doesn’t allow you to create variables. If you try to add a few variables to it, it would generate errors. Now I would like to share a few concepts for the valid data types in JSON and what they are and how you should use them in your own JSON data files.

JSON data types

JSON data types are the valid values that can be used in JSON files. In this section I want to clarify the values that they can hold, how you can use them in your own project data-interchange formats.

JSON Object

At the root of the JSON document, there needs to be either a JSON object or a JSON array. In JavaScript and in many other programming languages an object is denoted by curly braces; “{ }”. JSON uses the same notation for denoting the objects in the JSON file. In JSON files, objects only contain the properties that they have. JSON can use other properties, other data types (including objects) as the value for their properties. How that works, I will explain that later in this course guide, but for now just consider that each of the runtime object is mapped to one JSON object in the data file.

In the case of an object, there are properties and their values that are enclosed inside the opening and closing curly braces. These are in the form of a key/value pair. These key value sets are separated using a colon, “:” and multiple sets are separated using a comma, “,”. An example of the JSON object is as follows:

{
  "name": "Afzaal Ahmad Zeeshan",
  "age": 20
}

Even the simplest of the C#, Java or C++ programmers would understand what type these properties are going to hold. It is clear that the “name” property is of “string” type and the “age” property is of integer type.

There are however a few things that you may need to consider at the moment:

  1. An object can contain any number of properties in it.
  2. An object can omit the properties; being an empty object.
  3. All the property names (keys) are string values. You cannot omit the quotation around the key name. It is required, otherwise JSON would claim that it was expecting a string but found undefined.
  4. Key/value sets are separated by a colon character, whereas multiple sets are separated using a comma. You cannot add trailing commas in the JSON format, some of the APIs may through error. For example, JSON.parse(‘[5, ]’); would return an error.

I will demonstrate the errors in a later section because at the moment I want to show you and teach you the basics of JSON. But, I will show you how these things work.

By now the type of the JSON object is clear to you. One thing to keep in mind is that JSON object is not only meant to be used as the root of the JSON document. It is also used as a value for the properties of the object, which allows the JSON document to contain the entire data in the form of relationship with objects; only difference being that the objects are anonymous.

JSON Arrays

Like JavaScript, JSON also supports storing the objects in a sequence, series or list; what-ever you would like to put it as. Arrays are not complex structures in JSON document. They are:

  1. Simple.
  2. Start with a square bracket, and end on the same.
  3. Can contain values in a sequence.
  4. Each value is separated by a comma (not a colon).
  5. Value can be of any type.

A sample JSON array would look something like this,

[ "Value 1", "Value 2" ]

You can store any type of value in the array, unlike other programming language such as C# or C++. The type of the values is not mandatory to be similar. That is something that pure C# or C++ programmers cannot fathom in the first look. But, guys, this is JavaScript. I used JSONLint service to verify this, later I will show you how it works in JavaScript.

Screenshot (1642)
Figure 2: JSONLint being used for verification of JSON validity.

In JavaScript, the type doesn’t need to be matched of the arrays. So, for example you can do the following thing and get away with it without anything complaining about type of the objects.

var arr = [ "Hello", 55, {} ];

So, JSON being a JavaScript-derived document format, follows the same convention. JSON leaves the idea of type casting to the programmer, because this is performed only in the context of strongly typed programming languages such as C++, C# etc. JavaScript, being weakly typed doesn’t care about the stuff at all. So, it can take any type in an array as long as it doesn’t violate other rules.

Upcoming data types are similar to what other programming languages have, such as strings, integers and boolean values. So, I will try to not-explain them as much as I have had explained these two.

JSON Strings

String typed values are the values which contain the character-type values. In many programming environments, strings are called, arrays of characters. In JavaScript, you can use either single quotes or double quotes to wrap the string values. But, in JSON specification you should always consider using double quotation. Using single quotation may work and should work in JavaScript environment but in the cases when you have to share the data over the network to a type-safe programming environment such as where C++ or C# may be used as the programming language. Then your single quotes may cause a runtime error when their parsers would try to read a string starting as a character.

In JSON, strings are similar and you have been watching strings in the previous code samples. A few common examples of string values in JSON are as following:

// Normal string
"Afzaal Ahmad Zeeshan"

// Same as above, but do not use in JSON
'Afzaal Ahmad Zeeshan'

// Escaping characters, outputs: "\"
"\"\\\"" 

// Unicode characters
"\u0123"

In the above example, you see that we can use many characters in our data. We can:

  1. Build normal strings such as C# or C++ strings.
    • JSON standard forbids you from using the single quotation because you may be sending the data over to other platforms.
  2. Escaping the characters is required in strings. Otherwise, the string would result in undefined behavior. You can use the similar string escaping provided in other languages such as:
    • \”
    • \\
    • \/
    • \b
    • \f
    • \n
    • \r
    • \t
    • \u-4-hex-numbers
  3. Unicode characters (as specified in the last element of above list) are also supported in JSON, you can specify the Unicode character code here.

One thing to consider is that your objects’ attributes (properties) are also keyed using a string value.

{
    "key": 1234
}

The value of a property can be anything, but the key must always be a string. The strings in JSON, JavaScript, C++, C# and Java are all alike and have the same value for each of the sentence. Unicode characters are supported and need not to be escaped. For original JSON website, I got this image,


Figure 3: JSON string structure.

Thus, the strings are similar in JSON and other frameworks (or languages).

JSON Integers

Just like strings, integers are also the literal values in the JSON document that are of numeric type. They are not wrapped in quotations, if they are then they are not numeric types, instead they are of string type.

A few examples of integer values are:

// Simple one
1234

// Fractional
12.34

// Exponential
12e34

You can combine fractional and exponential too. You can also append the sign of the number (negative – or positive +) with the number itself. In JSON these types can also be used as the values. If you take a look at the example above in a few sections above, you can see that I had used the age as an integer value for my property. A few things that you should consider while working with JSON data is:

  1. In exponential form, “e” and “E” are similar.
  2. It must never end with “e”.
  3. Number cannot be a NaN.
  4. Number encoding and variable size should be considered. JavaScript and other language may differ in encoding the variable size for the numberics and may cause an overflow.

JSON Boolean

Boolean values indicate the results of a conditional operation on an expression. Such as, “let him in, if he is adult”. JSON supports storing values in their literal boolean notation. They are similar to what other programming languages have in common. They must also not be wrapped in quotation as they are literals. If a boolean value is wrapped in quotation then it is not a boolean value but instead it is a string value.

// Represents a true result
true

// Represents a false result
false

These must be written as they are because JavaScript is case-sensitive and so is JSON. You can use these values to denote the cases where other types cannot make much sense compared to what this can make, sense. For example, you can specify the gender of the object.

{
    "name": "Afzaal Ahmad Zeeshan",
    "age": 20, 
    "gender": true
}

I didn’t use “male”, instead I used “true”. On the other side I can then translate this condition to another type such as,

if(obj.gender) {
    // Male
} else {
    // Female
}

This way, other than strings and numeric values we can store boolean values. These would help us structure the document in a much simpler, cleaner and programmer-readable format.

JSON null

C based programmers understand what a null is. I have been programming in programming languages such as, C, C++, C#, Java, JavaScript and I have used this keywords where the objects do not exist. There are other programming languages such as Haskell, where this doesn’t make much sense. But, since we are just talking about JavaScript and languages like it, we know what null is. Null just represents when an object doesn’t exist in the memory. In JavaScript, this means the “intentional absence” of the object. So in JavaScript environment a null object does exist but has no value. In other languages it is the other way around; it doesn’t even exist.

It just has a single notation,

null

It is a keyword and must be typed as it is. Otherwise, JavaScript-like error would pop up, “undefined“. This can help you in sending the data which doesn’t exist currently. For example, in C# we can use this to pass the values from database who are nullable. There are nullable types in C#, which we can map to this one.  For example, the following JSON document would be mapped to the following C# object:

{
    "name": "Afzaal Ahmad Zeeshan",
    "age": null
}

C# object structure (class)

class Person {
    public string Name { get; set; }
    public int? Age { get; set; }      // Nullable integer.
}

And in the database if the field is set to be nullable, we can set it to that database record. This way, JSON can be used to notably denote the runtime objects in a plain-string-text format for data-interchange.

Examples of use

I don’t want to stretch this one any longer. JSON has been widely accepted by many companies even Microsoft. Microsoft was using the web.config file in XML format for configuration purposes of the application. However, since a while they have upgraded their systems to parse and use the settings provided in a much JSON way. JSON is very simpler and easier to handle.

Microsoft started to use JSON format to handle the settings for their Visual Studio Code product. JSON allows extension of the settings, which helps users to add their own modifications and settings to the product.

I have been publishing many articles about JSON data sources and I think, if I started to use JSON then it was a sign of success of JSON over XML. 🙂

  1. Creating a “customizable” personal blog using ASP.NET
  2. Understanding ASP.NET MVC using real world example, for beginners and intermediate

There are many other uses of JSON and my personal recommendation is with JSON if you can use JSON over XML. However, if you are interested in XML or are supposed to use XML such as when using SOAP protocol. Otherwise, consider using JSON.

Errors in JSON

No, these are not errors in the JSON itself, but a few errors that you may make while writing the JSON documents yourself. This is why, always consider using a library.

Trailing commas

As already mentioned above, the trailing commas in the JSON objects or arrays cause a problem. The parser may think that there is another property to come but unexpectedly hits a terminating square or curly bracket. For example the following are invalid JSON documents:

{ "k": "v",  }    // Ending at a comma

[ 123, "", ]      // Ending at a comma

These can be overcame if you:

  1. First of all, write your own parsers.
  2. Make them intelligent enough to know that if there is no property, they can ignore adding a property, simply.
  3. If there is no more value in the array after the comma, it means the array ended at the previous token.

However, present parsers are not guaranteed to be intelligent enough so my recommendation is to ignore this.

Ending with an “e” or “E”

If you end your numbers in exponential form with a e, you are likely to get an error of undefined. You know what that means, don’t you? It is always better to end it is a proper format following the specification.

Undefined

Each property name must be a string token. In JavaScript you can do the both of the following:

var obj = { "name": "Afzaal Ahmad Zeeshan" };

// OR
var obj = { name: "Afzaal Ahmad Zeeshan" };

But in JSON you are required to follow the string-based-key-names method of creating and defining the object properties. In JSON, if you do the following you will get error,

{ 
   name: "Afzaal Ahmad Zeeshan"
}

Because, name is undefined. Parser may consider it to be a variable somewhere but JSON documents cannot be executed so there is no purpose of JavaScript variables to be there. Some libraries may render the results for your documents even if you leave your property names un-stringed. But, don’t consider everything to be server always follow the specifications.

C# side of article

To this point I hope that JSON is as simple as 1… 2… 3. for you! If not, please let me know so that I can make it even more clear. But, in this section I want to talk about using JSON in your C# projects. In this section I am going to talk about the libraries that are available in C#, or more specifically I am going to talk about JSON.NET library. I will use this library to explain how JSON can be used to save the state of the objects. How you can create a JSON file, how you can parse it to create objects on runtime and how serialization and deserialization works.

This section will be a real world section covering the methods and practices that you can use to use JSON in your own applications. I will cover most of the C# programming part in this section so that you can understand and learn how to program JSON in your .NET environment.

JSON.NET library

I am specifically just going to walk you through JSON.NET library. JSON.NET is a widely used JSON parser for .NET framework. I have been using this library for a very long time and I personally this is one of the best APIs out there for JSON parsing.

Screenshot (1669)
Figure 4: Json.NET comparison with other popular JSON serializers.

I will use the objects provided in this library just to demonstrate how you can parse JSON files to runtime objects, and how you can create JSON strings (serialize the objects) using the objects provided to the serializer. By the end of this post you will be able to create your own JSON-oriented-and-backed applications in .NET framework (or any framework that supports C# programming).

Creating the object for this guide

In C#, we create classes to work around with real-world objects. We can then use this library to convert the runtime structure of that object to a storable JSON document that can be used to:

  1. Send over the network.
  2. Save on the disk.
  3. Save for loading the object in that state later.

Many other uses. The counterpart of this process is the deserialization of the objects in runtime structures from their JSON notation. First of all, I will create a sample class that we are going to use to convert to JSON format and from the JSON format.

class Person
{
    public int ID { get; set; }
    public string Name { get; set; }
    public bool Gender { get; set; }
    public DateTime DateOfBirth { get; set; }
}

This object has the following diagram.

Screenshot (1670)
Figure 5: Person class diagram.

Frankly speaking, this object can be created in C++, it can be created in Java and it can be created in JavaScript too. If we use JSON for serializing this object, or the number of objects that can be transmitted over the network to the peers on the networks. Since we have stringified the data in JSON notation, we now can parse the string data in other languages too. Every other programming language has a JSON parser library.

We can redefine the structures in other programming languages and then use a JSON parser library to convert this string over the network in those machines too. I am going to cover C# part of programming only.

A few things that you might want to know here before we move forward. I have used the datatype of “DateTime” because I wanted to show how derived types are converted to when they are being serialized to JSON notation. So, let’s begin the C# programming to understand the relative stuff in their C# counterparts.

Serializing the objects

In programming, serialization is the process of converting the runtime objects to a plain-text string format. In other words, it converts the object structure from memory to a format that can be stored on the disk. Serialization just translates the state of the objects, which is that it just translates the properties of the object to the format that can be used to store them for later use. You can think of it as synchronization process, where you store the current state of the objects on the disk so that you can load the data later and start your work from the state where you left it instead of starting from scratch again.

Since we are talking about JSON here, we are interested in the conversion of objects in their JSON notation for storage (serialization) and then in the upcoming section to convert the JSON document into runtime objects and data structures (deserialization). Simply, we are going to see how to convert the JSON into objects and vice versa.

To serialize the object, you need an object that holds the data in itself. The object would have a state in the application. We then call the library functions to serialize the objects in their JSON notation. Like this,

// Create the person
Person myself = new Person { 
                    ID = 123, 
                    Name = "Afzaal Ahmad Zeeshan", 
                    Gender = true, 
                    DateOfBirth = new DateTime(1995, 08, 29) 
                };

// Serialize it.
 string serializedJson = JsonConvert.SerializeObject(myself);

// Print on the screen.
 Console.WriteLine(serializedJson);

The function is called to serialize the object which (as clearly seen) return a string object. This object holds the JSON notation for the object. The output returned was like this, (yes, I formatted the JSON document for readability)

{
    "ID": 123,
    "Name": "Afzaal Ahmad Zeeshan",
    "Gender": true,
    "DateOfBirth": "1995-08-29T00:00:00"
}

We create store the data in a file, send it on the network or do what we have to. I am not going to cover that part because I think (and believe) that this is totally relative to your application design and how it is expected to work. Now, we need to understand how it happened.

The ID, Name and Gender are the types that you have already seen. However the last field was actually of type DateTime which got translated to string type in JSON. Why? The answer is simple, JSON doesn’t provide a native DateTime object to store the date and time values. Instead, they use string notation to store the date value. The string value is very much self-explanatory as to what the year is, what month and what value date has. The time part is also clearly visible.

One thing to note here is that C# and JSON can agree on using the “null” value for objects too. Thus if the name is set to a null value, JSON can support the same value of null in its own document format. In the next section, we will study how JSON is mapped to the objects.

Deserializing the JSON

In data-interchange, this is the counterpart of the serialization process. In this process, we take the JSON document and parse it the runtime object (collection). There are many libraries available that can be used for parsing purposes however I am going to talk about the same one that I had been using to demonstrate the usage in C# programming environment. The method is very simple in this case too, However, I am going to use a JSON formatted string variable to use to parse it to the object.

Note: You can use values from files, networks, web APIs and other resources from where you can get the JSON formatted document. Just for the sake of simplicity I am going to use a string variable to hold the values.

The sample JSON data can be like the following,

string data = "{\"ID\": 123,\"Name\": 
               \"Afzaal Ahmad Zeeshan\",\"Gender\": 
               true,\"DateOfBirth\": \"1995-08-29T00:00:00\"}";

I used the following code to deserialize the JSON document.

// Serialize it.
Person obj = JsonConvert.DeserializeObject<Person>(data);

// Print on the screen.
Console.WriteLine(obj.ID);

Now notice one thing here. This “DeserializeObject” function has two versions.

  1. A plain non-generic version.
  2. A generic version.

If you use the non-generic version, then in C# you are going to use the dynamic object creation in C# and then we will be using the properties. For example, like the code below:

dynamic obj = JsonConvert.DeserializeObject(data);

Console.WriteLine(obj.ID);

Using that dynamic keyword would allow you to bypass the compile time check and allow you to get the “ID” property at a later time. This can be handy when you don’t want to create a class and deserialize against.

However, the version that I am using at the moment is different. It uses a type-parameter that is passed as a generic parameter; angled brackets, and Json.NET deserializes the JSON document and fills up our objects. We can also have array of objects, this way instead of “convincing” the program to iterate over the collection. We can first of all have the JSON parsed as an array of objects and so on. This would help us shorten the code and to check the stuff at all.

var listOfObjects = JsonConvert.DeserializeObject<List<Person>>(data);

Notice that we are passing a “List<>” object. Library would convert the stuff into the list of the objects and we can then use the collection for iterative purposes.

Some errors

There are a few errors that I would like to raise here, which might help you in understanding how JSON works. I will update this section later as I collect more data on this topic.

Type mismatch

If you try to deserialize the JSON of one type (such as, an object) into a type where it cannot be converted to (such as, an array). Library will raise an error. So do the following:

  1. Either make sure which type to convert to. Or
  2. Do not convert to a generically passed type, instead use dynamic keyword to deserialize the object and then check its type later on runtime. That still doesn’t guarantee it to work.

My recommendations

Finally, I want to give you a few of my own personal experience tips. In my experience I started to work with data on a database system; SQL Server CE I remember. But later I had to create applications which required a bit complex structures and were not going to last another weak. So in such conditions, using a database table was not a good idea. Instead, I had to use a sample and temporary data source. During those days, XML was a popular framework as per my peers. JSON was something that most didn’t understand. So, in my own humble opinion, you should go with JSON, where:

  1. Data needs to be shared cross-platform, cross-browser and cross-server. Databases may be helpful, but even they need serialization and stuff like that.
  2. You just need to test the stuff. You can target your Model to the JSON parsers and then in release mode change them to the actual data sources.

That is not it, the size of JSON is “amazingly” compact as compared to XML. For example, have a look here:

// JSON
{
 "name": "Afzaal Ahmad Zeeshan",
 "age": 20,
 "emptyObj": { }
}

// XML
<?xml version="1.0" encoding="UTF-8" ?>
<name>Afzaal Ahmad Zeeshan</name>
<age>20</age>
<emptyObj />

Even in the cases where JSON has nothing in it, XML is bound to have that declaration line. Then other problems come around, such as sending an array, or sending out a native type object. In JSON you can do this,

true

In XML, you don’t have any “true” type. So, you are bound to send something extra. Which can cause to be a bottleneck in the networking transmission. I have been writing many articles, blogs and guides and most of them are based on JSON if not on SQL Server.

A simple guide to setting up home server using IIS and ASP.NET

Hey everyone, it’s been a very long time since I wrote anything at all, my apologies, it had been my exams and I had been very busy these days. But, now I’m back. This time I am writing a guide to setting up your own personal server at home. Typically, I write about stuff from ground up, but for the sake of speed, I will like you to have a bit of background of a few of the things. I will try my best to cover them too, but excuse me if I miss a few things. These are because I want to cover a lot of things in this one single guide, and then I will write about other configurations and updates in a later post.

Introduction and Background

I had been working on ways to allow my family to communicate through proper use of their devices, however, every method required a third-party software to communicate. Plus, it required a working internet connection. If the requirement is just the connectivity and not the Internet-connectivity, I thought why not I create a server for home that would let us to communicate, share items without having to pass it through third-party networks, besides, who trusts them? That was not the main reason, the main reason that I also enjoyed building a server for the family. 🙂

In this post, I will walk you guys through building your own web server, you can for sure then update the web application, configure the services as you need! In this post, I will walk you through the following:

  1. Setting up the server.
    • I am using Windows Server 2012 for my purposes. I will walk you through installation of IIS (Microsoft’s web server) and a few other components required. You can install other components as required.
    • Setting up an IP address to be used on your server.
  2. Setting up ASP.NET environment.
    • You do have to install ASP.NET components before IIS can execute ASP.NET code in your web application.
  3. Setting up Web Deploy.
    • I don’t do web development on server (AKA hosting) environment. Instead, I will be developing the stuff on my own laptop. Then, I will require a service to deploy the stuff on the server.
    • I will walk you through setting up the Web Deploy on server.
    • I will walk you through setting up the publish profile file, to be used while publishing the web application to server through Visual Studio.
  4. Publishing and running the web application.

I assume you have the basic ideas and understanding of how this stuff works, what a server is, how your web applications work, how IP addressing works and what a DNS is. I will try my best to explain these components to you too, but if I miss out anything, excuse me. Sometimes my posts do get hard to understand, if they do, just ping me and I will make things clear, it’s really hard to think of so many things at the same time… 😉

Now, I will break the procedure down and will write about them in steps.

Setting up the server

First of all, let’s talk about setting up the server. Nothing special here, just installation of Windows Server. I could have used other servers, but then I would have needed to add patches to my applications and so on. So, instead of this, I would recommend that you just install Windows Server on your machine. You can get an evaluation copy from Microsoft, Try Windows Server 2012. Later, just install the Windows Server, I am sure you know how to do that. Also before you continue, please read the requirements for Windows Server.

You can find the explanation and procedures for installing Windows Server online. Learning procedures are also very much simple. Microsoft itself has invested a lot of good resources online for teaching and fine-tuning IT professionals. So you can learn using Windows Server from there too.

References:

  1. What’s New in Windows Server 2012 R2 Jump Start
  2. Windows Server 2012: Web and Application Platform

Configuring the IP address to be used

If you have ever been in networking, then you already know that every device has an IP address that is used to communicate with it. Since, our server will be the hub for our communications. We need to ensure that the IP address doesn’t change. So, we would assign the IP address to our server which we would like to be used throughout the network.

Note: I will later talk about using hostnames and how to setup DNS servers on your servers for friendly URLs. For this post, let’s keep things simple and numeric.

To open the configuration window, follow the steps:

  1. Open the Network and Sharing center.
  2. Select “Change adapter settings”
  3. Select the device that you are connecting through. There may be an Ethernet connection and a Wireless connection available. Select the one that you want to use. Right click → Open the Properties Window.
  4. We are going to update the IPv4 settings and we are just going to assign the IP address we want the device to use. So, in the list provided, select the option with “Internet Protocol Version 4 (TCP/IPv4)”. Double click.

By default, mostly, “Obtain an IP address automatically” is selected, we are going to override the default settings so we need to change this option to the one that we want. But remember, we don’t want to tinker with the DNS, Subnet mask and the gateway being used. First things that you need to understand are the local addresses in the IPv4 range. A private IP address belongs to the local network instead of the external networks such as Internet. The local IP address ranges are:

  1. 10.0.0.0 to 10.255.255.255
  2. 172.16.0.0 to 172.31.255.255
  3. 192.168.0.0 to 192.168.255.255

So, you can use any of the range from this, and assign this IP to your server. Your router will be able to detect the computer, however, the request won’t be sent to external networks because that is not where the IP address belongs to; local network’s IP address. So, according to my own address, network system and addresses. I will set things to the default ones that my ISP provides me with but will select a random IP address from the local range.

13271833_1069172973149577_1150434510_o
Figure 1: Configuring the IP address for the server.

Later, we will be using a DNS server to configure how we use the service on our devices and so on. Until this step, our server is set up and we can now install the web server to handle the incoming requests and to forward them to a “web application”. Head on to the next step.

Installing the components — and IIS

In Windows Server, you don’t have to get the executables for everything, instead you just enable and disable the services, much like Turning Windows feature on or off. In Windows Server, open your Server Manager.

13288130_1069204476479760_1806657737_oFigure 2: Server Manager application in Windows Server.

In that,

  1. Select “Add roles and features”. This feature is used to add more services to the environment and to add or remove features from the server.
  2. Select “Role-based or feature-based installation”.
  3. Select the server. By default there will be just one server listed. If you have multiple, select the one that you want to use for the installation of the feature.
  4. Select the features and roles that you want to install on your machine.
    • For this section, I will just install IIS server. Select “Web Server (IIS)” and install. It is also recommended that you install .NET 4.5 features from the features list.
    • Add more features as per requirement of your server and the services that you are going to build for.
  5. Finally Install the selected components.

I typically do a machine restart after installing every component or service. This is not required all the times however, most of the times you should restart the machine to ensure that the components are installed and are running properly.

Now let’s dissect IIS sections in bits and study what we got there… To start IIS manager, open the Start menu and search for “inetmgr“, it would give you the application for IIS server.

13271866_1069204489813092_1090144792_o
Figure 3: IIS server main page shown.

You can see that this portal now lets you create new sites, connect to applications, configure the server properties, their IP addresses, domains. Even it allows you to get helpful material from peers such as TechNet, ASP.NET official website, IIS official website and much more. Navigate down to the server, by default IIS has a “Default Web Site” web site created in the environment, which is used to test whether the server works or not. You can here configure and update the server itself. You can modify the certificates, HTTP handlers, SMTP management and everything that is related to your server. Usually, everything will be managed automatically, you won’t need to do anything complex. However, in many cases you will personally have to change the state of the machine and the framework.

13262522_1069204499813091_532248963_o
Figure 4: Default Web Site home page visible in IIS server.

I had installed other components related to ASP.NET itself, which may not be visible in your machine at the moment. If everything is similar, great, if not, continue reading as I will also teach you about configuring the ASP.NET framework on Windows Server.

Look to the right panel, it contains everything that you want to do with your application. It contains quick actions such as restarting the application, configuring the application, installing more services from built in galleries and much more.

Web Platform Installer

Another excellent feature to talk about here is the Web Platform Installer. This application allows you to install the best of the Microsoft products in no time. It scans your machine, checks it for updates, new software package releases and allows you to install them by directly downloading the packages on your machine.

main-webpi-download
Figure 5: Web Platform Installer can be used to install any software package relative to your machine architecture and operating system.

I wanted to talk about this great product by Microsoft, I have really enjoyed it since my days when I was starting learning how to program using WebMatrix. I really miss that tool too, but since Microsoft is no longer updating it, and Visual Studio is a beast, I don’t use or recommend it to anyone.

References:

  1. Adding Server Roles and Features
  2. Official IIS website

Setting up ASP.NET environment

Installing the IIS itself is not enough, ASP.NET doesn’t come pre-shipped with it. You need to go to Server Manager and install the ASP.NET components, I suggest you install maximum of these components. Although, they are not required and only those components are required which you are going to use and which would be required in the production application. In the roles section, go to, Web Server → Web Server → Application Development.

13275301_1069220659811475_904150246_o
Figure 6: Installation of ASP.NET feature on Windows Server.

Select the frameworks that you want to install on your machine. They are required before you can actually publish the stuff on your server. I selected ASP.NET 4.5 and the platform select the dependencies to be installed. I had already installed the framework so it turned that to gray in color to show that the selection is disabled. If you want to select any more features that you want, such as Classic ASP (by the way, why?) then you can select that from the list and then finally go to the final stage and click, “Install”.

This would take some time, depending on many things, such as internet connection, your machine hardware, etc.

I suggest you restart the machine, to ensure things are working properly. Now that everything has been set up, we now need to publish an application to our server that we would be using through that IP address that we just assigned to our servers. But before we do so, it won’t be a good idea to always go back and copy paste or send the files and then replace the files here and there. Even though this is a personal project, things may get really tough and confusing when you have to publish the changes to the server. So, for that sake, we are going to use Web Deploy tool and we are going to connect our development tools with the server itself. You must be familiar with Web Deploy tool, aren’t you?

Setting up Web Deploy

Before continuing to the final stages, I wanted to ensure that all of my changes can be pushed to the servers without having to change and update the content myself. Microsoft Web Deploy is one such feature. It allows you to deploy the content remotely, updating the registries, files and other stuff. However, we are interested in another feature, “Publish Profile” file generation. This is a plain-XML file, used to configure the deployment process of the machines. Currently, Web Deploy 3.6 has been released.

Web Deploy would allow you to publish the changes to your project to your server, hosting environment, in no time! I really love this feature because I have been working on a few updates for my website and Web Deploy proved itself to be very simple, through the procedures like publish profile files where settings are saved in XML, and Visual Studio takes care of connections and publishing. To install Web Deploy, you need to enable the “Windows Deployment Services” role in Server Manager. This role would allow your server to be connected through remote devices for publishing purposes. Later, you can use the Web Platform Installer to install the Web Deploy service.

13275376_1069247266475481_1528371918_o
Figure 7: Windows Deployment Services option shown in gray; third last.

Web PI manages most of the dependencies itself. So, if you select a framework or package to be installed, Web PI would itself manage the dependencies that a package requires to be existing on the machine environment.

13282745_1069247279808813_340198950_o
Figure 8: Web PI showing the list of Web Deploy packages found on the servers.

We’re — almost — done now. The final step is to configure the publish profile file. We would be using that file in our development environment to publish the web application.

References:

  1. Web Deploy
  2. Installing and Configuring Web Deploy on IIS 8.0 or Later

Configuring deployment options

Every application requires a different directory, thus every web application would require a different profile to be used while deploying the application to the servers. I am going to talk about the default ones. The default web site can be configured to support Web Deploy based remote deployment of the application’s source code.

13282383_1069252993141575_1898688729_o
Figure 9: Configuring the web deploy publishing option in web application in IIS manager.

Next you will select the settings that you want to do for the publishing of the application. They are simple and easy to understand.

13262145_1069254479808093_1777487270_o
Figure 10: Web Deploy configuration window.

I will now walk you through these options that you can configure as per your own needs.

  1. User: This is the user account that you will use to publish the website on behalf of. You should create a separate user account and then use their configuration as the authentication while publishing. I used the administrator account because I wanted to keep things simple.
  2. SQL Server connection string: The connection string to be used, for SQL Server.
  3. MySQL connection string: Same as above, but for MySQL instead.
  4. URL: This is the location where the server resides.
  5. Location: This is where you will find this publish profile file once it has been saved.

Once you are happy with the settings, just click, “Setup”. This would process the settings and will finally create the file for you to send over to your development environment. I will leave the development stages and steps for sake of simplicity, instead I will continue to publishing step. I will, however, be adding the references to my previous posts related to ASP.NET programming.

Publishing and running the web application

Once everything has been done, you can just send the publish profile to your development environment to publish the web application. You can send it through any method, any medium as required.

To proceed, select Build → Publish {ProjectName}. This would allow you to select from a bunch of options, what you want to do. Click on “Import” and then select the publish profile file, this would allow you to select the same settings that you have configured from your server.

Screenshot (7025)
Figure 11: Publish dialog in Visual Studio.

Select the file that you just pushed to the development environment. VIsual Studio would automatically read the file and would fill the fields.

The actual XML file content are:

<?xml version="1.0" encoding="utf-8"?>
<publishData>
  <publishProfile
     publishUrl="https://WIN-UEN6KL61CTO:8172/msdeploy.axd"
     msdeploySite="Default Web Site"
     destinationAppUrl="http://WIN-UEN6KL61CTO:80/"
     mySQLDBConnectionString=""
     SQLServerDBConnectionString=""
     profileName="Default Settings"
     publishMethod="MSDeploy"
     userName="WIN-UEN6KL61CTO\Administrator" />
</publishData>

These are the similar values that we had. Now, we can see in the following image that Visual Studio uses the same values and builds the procedure itself. It would use these values to publish the web application.

Screenshot (7026)
Figure 12: Settings for publish profiles in Visual Studio.

It is not required, but you should at least test the connection. This would allow you to test the connection before pushing the web content to the destination.

Note that the “Password” field is empty. Password was not sent on the wire. We are required to enter the password for that user account; that server password. This step depends on how you design the system to publish the web application, if you use another account which doesn’t require the password, this would be a stupid idea in my opinion. So always keep an account (also, remember to keep an account other than the Admin account) and use its credentials. Use SSL to transfer the content on your production servers. After that, you should be able to submit the web application to the server.

Tuning and configuring

Not all the times a web application would work in its first attempt. You will face many problems, many hurdles. There are many good communities available which you can use to ask for help when you run into trouble. Just ensure that you understand what runtime is your application asking for, and which is available and much more.

I won’t write the ASP.NET code here, instead I will just show the default page content that my application has, before I actually show the rendering result of that page.

<p style="font-size: 10em;">Welcome :-)</p>

That would be enough to test the application. 🙂

Screenshot (7027)
Figure 13: Welcome message shown on the homepage of website.

As expected, notice two things.

  1. The IP address that we had set up for the server.
  2. Message that we had wanted to be shown on the browser screen.

This shows that we have now set up the server as we would want to. We can now continue to add more features to it and keep working on them to bring them to devices. 😉 Also, did you notice that I also have API in the navigation menu. It means that I will also post stuff about consuming the Web API through native mobile devices. Many things are coming during these 2 months. I would like you guys to let me know if you find that I have missed something from the post.

Points of Interest

I did have to go through a few problems, because of the resources being locked by IIS. Then there were a few problems with the .NET framework mismatch. Anyways, the process was very simple, robust and fast. I enjoyed building the server and the consumption of the web application.

I did not introduce database usage, authentication, which will be handled later in other posts. However, this post was just intended to explain the basic concepts of building up your own custom server for your own purposes. I will be posting other stuff that I find interesting in this process. I am also going to write it up as a guide that you may want to download later from C# Corner. I really like their way of publishing the content, you can get more of their eBooks from their community website.

I hope, you find this post interesting and simple to grasp. Phew! See you next time. 🙂

Why to use C# and when to prefer other languages?!

Introduction and Background

Either it is Quora, or is it C# Corner or is it CodeProject, beginners and novice users are always asking questions like, “Which one to use, C++ or C#?”, and many more similar questions. It is harder to provide an answer to such questions on multiple platforms and to multiple questions. That is why, I thought, why not post a blog post to cover most of the aspects of the question. In this post I am going to cover a few of the concepts that you may want to understand to chose either language from the most widely used languages:

  1. C or C++
  2. Java
  3. C# (or .NET framework itself)

Basically, my own preference in many cases is C#, but that depends on what I am going to build. I have been using C, C++, Java and C# in many applications depending on their needs, depending on how they allow me to write the programs and depending on whether it is the suitable programming language for this type of project and application architecture.

The way, I do that, is just a trick. Which, I am going to share with you, in this blog post. Among these a few of the very basic things to consider are:

  1. How simple and easy it would be to use this language in the program?
  2. What is the productivity of that language in your scenario!
  3. Difficulty level and how many people know the language!

I will be talking about these things points in this post, so to make it clear where to use which programming language. But my major concern in this post would be to cover the aspects of C# programming language.

Productivity of language

First thing to always consider about the language is the productivity that a programming language can provide your team with. Productivity of the language depends on many factors, such as:

  1. How programs are built in that language?
  2. How fast and reliable is it to build the project regularly?
  3. Is the program’s source code readable for other members on the team?
  4. Is the language itself suitable for the case that we are going to use it in.

Productivity of the language, in my opinion, is the first thing to consider as the valid candidate to always discuss in the team and not just talk about in a black room. You should manage to get your teams up in a conference room, and then talk about a language. There may be many aspects where one language may fall short and other may get well. There would be many factors that most of the programmers don’t know but talking about them one of the geek would stand up and raise another important point that may guide your team to walk on the correct paths to build greater applications.

Let’s talk a bit graph.

chart
Figure 1: Productivity graph of most widely used programming languages.

In this chart we can see that C is the most productive programming language, of which we are interested in; C, C++, Java and C#. C++ and C# are competing with each other, whereas Java is a bit behind than C# and so on.

In the above graph, it is clear that C# is an average programming language. The average doesn’t mean it is below the requirement. But it means that it can be used in any case, and its performance won’t fall as the data increases. The successful run graph shows that C# programs are much successful in many cases. That is why, in many cases, C# proves to be the valid candidate in many cases, since it is a general purpose programming language.

Then the question arises, “Productive in which sense?

That is the most important part here. Now, this topic may take a bit more of the time to explain how productive a language is. For that, I have dedicated the topic, “Choosing the right language for the right task“. The right programming language for the right task would always help you to elevate the speed of the programming of your team! But among other aspects, the most important ones are:

  1. What sort of project this is?
    • Of course you don’t want to use knife to unscrew a screw.
  2. What are the IDE and compilation tools present?
    • Even a program written in C can go wrong if compile is buggy or inefficient.
  3. How your team would like to manage the projects?
    • Does the language support good software engineering concepts?
    • Can it be used to generate good diagrams: Use-case, activity, class and other diagrams.

Thus, you should always consider thinking about the productivity of your development team while guessing which language to be used.

Choosing the right language for the right task

It is always stated to use the best tool for the best jobs! Then, why not use the best programming language for your projects, to get the best possible results? Before I continue any further, there is one thing I want to mentioned… “There is no best programming language ever built.” Every time a programming language is built for a purpose, another group of programmers jump in to create a new programming language, for the sake of fixing the errors in the previous language. What do you think motivated Bjarne to create C++ when there was C language and Scala already in the market?

In this section, there are many things to consider, from the performance and benefits to the clients, to the perk packages for the employees to the efficiencies of the project repositories and the tools provided for that programming languages.

C# was created by Microsoft and therefore, in my opinion, has, by far, the most efficient tools for programming. I mean, Visual Studio, alone is the beast in this game.

visual-studio-2013-logo
Figure 2: Visual Studio logo.

I am a huge fan of Visual Studio, and i would doubt someone who isn’t a fan of Visual Studio. C# has a better support and benefit of using the best IDE out there. Java has also a number of IDE, so does C++ and many of the C programs are written in minimal environments, like a small program to manage and compile the C programs; no offence geeks!

2013-12-27-csharp-for-systems-programming
Figure 3: Graph of performance to safety ratio.

Now, if you look at this graph, it’s pretty much clear as to what it is trying to guide you with. Of course, as I had mentioned in the starting paragraph here, that there is no best programming language.

In many cases, C# and Java rule over C++ (and C) and in many cases, they rule over C# and Java. There are many factors, like the programming paradigms, performance of the code that is generated; Just-in-time compilation, memory-management delay and so on. While C# and Java may provide the best environment to build “managed” programs in, there are many cases where C# and java don’t work well, like writing a low-level program. Java developers wanted to build a Java OS, but they had to give up because something’s aren’t meant to be done in Java. 🙂

Always consider to search before making the final call. There are many companies working in the similar field that you are going to work in. There would be many packages and languages built for your own field that may help you to get started in no time!

top201020programming20languages-100422646-orig
Figure 4: Top 10 programming languages.

But, I think these are a bit backwards. I think, C is on the top because it causes a lot of trouble to beginners, so everyone is searching for “How to do {this} in C” on Google, raising the rankings. 😉

Selecting the best framework

I don’t totally agree with people when it comes to talk about frameworks like, Java, Qt (which I do like in many cases; like Ubuntu programming), and other programming frameworks available for programming applications to be run despite the architecture of the machine. In this case, my recommendation and personal views for .NET framework are very positive. As, already mentioned, I have programmed on Qt framework for Android, Ubuntu and Linux itself. It was a really very powerful framework to build applications on. But the downside was it was tough to learn, their compilers were modified, their C++ was tinkered.

While selecting the best framework for application development by choices are below:

  1. How much flexible a framework is?
  2. What language does it support?
    • Some frameworks support multiple languages, like .NET framework, it supports C#, VB.NET, Visual C++, JavaScript applications.
  3. Is it cross-platform?
  4. If not cross-platform, then does it support multiple architectures, at least?

Java framework is cross-platform, and entirely framework oriented. You simply have to target the framework despite the operating system or architecture being used. .NET framework on the other hand is a very beautiful framework to write applications on. It uses C#, VB.NET and C++ (no Java!) to write the applications, and then the compiled binaries can be executed on many machines that can support .NET framework. This provides an excellent cross-architecture support.

C# however, does not support Mac OS X, at the moment. Microsoft has started to roll out cross-platform binaries for C# programs. .NET Core has been a great success and once it gets released to a public version, I am sure most of the companies would start to target it. That is not going to happen, in a near future. In which case, Java and C++ are better than C#.

If you are interested in C# programming on multiple platforms, consider using Mono Project instead. You can read about that, on my blog here: Using C# for cross-platform development.

spectrum
Figure 5: Top languages and their platforms of usage.

Java may be supported 100% in the rankings, but C# is also supporting multiple platforms and is rapidly growing making the language better than the rest. With the release of C# 6, Microsoft has proved that the language is much better than the rest in the race. There are many features that I like C# 6:

  1. String interpolation
  2. Getter-only auto-properties as lambdas
  3. Improvements to lambdas

There are a few things Java still doesn’t have. For example, one statement code to write the data to the files and to extract the data. You have to get messy in the streams, or you have to write an entirely non-intuitive code with Files object and then to get the data from there… Yuk!

Performance of the compiled code

Writing the source code may be different in many ways:

  1. Syntax of the programming language.
  2. The way their objects and procedures are imported in the source code.
  3. How clean the source code looks. Many programming languages are just nightmares.

But the major concern comes to mind when we are going to execute the programs. In many cases, or should I say in all the cases, the language which are bytecoded languages, lag behind than the languages that are compiled to native codes or Assembly codes. For example, C or C++ codes are faster, because they are not compiled to a bytecode instead they are generated as machine codes for a platform or architecture. C# or Java programs are compiled down to a bytecode which causes a JIT to occur when the programs are executed. This takes time.

However, you can see the following charts from https://attractivechaos.github.io/plb/ and see for yourself, the way bytecoded languages are similar and how much compiled languages are different, see for yourself.

plb-lang
Figure 6: Mathematical calculations.
plb-lib
Figure 7: Pattern matching and machine learning.

Which makes it pretty much clear, how much compiled language are faster than bytecoded, and then come the ones that are interpreted, like Ruby.

In many cases, there are other factors too, which cause bad performance:

  1. Bad compiler.
  2. A lot of resources being allocated.
  3. Slow hardware resources; bad combination of CPU, RAM and other peripherals.
  4. Bad programmer and bad code being used.
  5. Bad practices of programming.
  6. Keeping CPU halted for most of the times.

Much more are a valid candidates for the halting processes.

Finally… Final words

As I have already mentioned that there is no best programming language out there. One language is best in one case, other is best in another case and so on and so forth. In such cases, it is always better to communicate with your development team and then ask them questions and ask for their feedbacks. Choosing the good tools for your projects is always a good approach and good step in the process of programming.

If your software engineer or software architect are trying to find a good solution, ask them to work on the following questions:

  1. What are the teams and developers qualified for?
    • Asking a team of C++ programmers to leave C++ and join Java or C# programming teams is not a good idea!
    • Always consider the best approach.
    • Time is money — Manage it with care.
    • Recruit more programmers with skills.
  2. Is the programming language long lived, or a minor one?
  3. Is programming language capable of making your application work?
    • I have used many programming languages, and thus I can decide which language to use. This is the job of your software architect to decide which languages to select.

If you follow these rules, you will save yourself from many of the future questions that cause a lot of problems. Many times developers ask questions like, “I have an application in Java, how to migrate it to C#?” Many web developers ask questions like, “I have a PHP application, how to convert PHP code to ASP.NET?” These questions have only answer. “Re-write the applications”.

There are many things that you should consider before designing the applications. Facebook is stuck with PHP, because it was written in PHP. Even if they wanted to migrate to ASP.NET, they won’t. Instead, they have found a work around the PHP bugs and downsides.

This is why, you should always consider using a conference or meeting to decide how to start the project, which programming language to use, what frameworks to target, who would lead the team and much more. These few days of discussion and designing would save you a lot of money and time in future.

Building a custom documentation tool

Introduction and Background

A team of software developers would all be willing to write a great amount of documentation because after all it is the document that provides their users a resource from where they can get some help. But if your team believes in Agile development methodologies, then you are better off left with programming and “no-documentation” face! That is not at all a problem to most of the programmers, but that is also not a good practice after all. Most of the libraries and tools out there require a good documentation of their APIs. This can be understood by the fact that many programmers are building applications for Microsoft platforms and not for other platforms. I consider myself one of them. The fact is easy, to get any kind of help in Microsoft platforms, I just need to go to MSDN (Microsoft Developer Network) and I can get any document, help with any framework, with any object, with any task and much more. Microsoft has really invested a lot of their times in building a great amount of resources on internet. Their investment pays off in a way that others cannot expect to get paid. The result is, they get a lot of attention from developers, and novice programmers also feel great while programming. Compare this to that of a Linux, compare this to that of any Java library and so on. I don’t want to be biased, but Java APIs, even of Oracle, are very badly written. There is a list of functions, but no remarks, no explanation, no nothing. Which makes it much more complex for beginners to learn and get a grasp of.

Currently I am seeking my Master’s degree in Computer Science and I am going to have a project to build later this year. While that has some months to come, I am thinking of something to build that would help me in many ways. One of them is to build a custom program that helps me to document the API so that I can submit that to the professors when they ask me for my project.
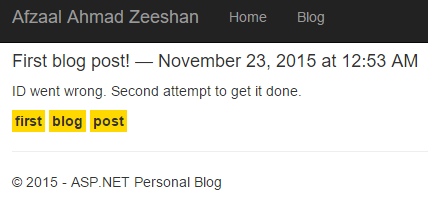
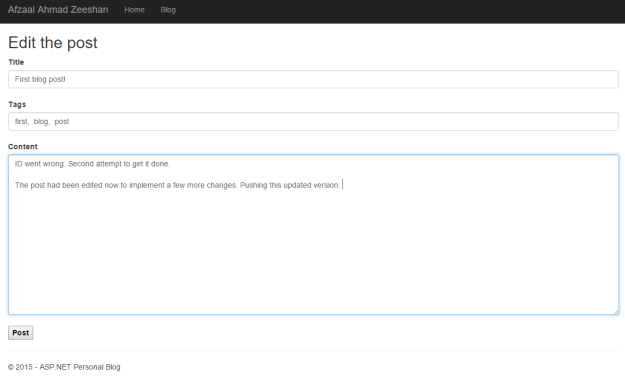
This blog post is about the “things” I have thought about, while building the tool. I haven’t built the tool yet, but I am hoping to have it built soon. But, I can show you the blueprint and the scratch code for that.

Why document the code?

If you are an indie developer, and you don’t like to share the code with anyone, don’t worry about this. Chances are, that 2 or 4 years later, you may “still” have the idea, why you wrote down that code. But if you also have to share the same code with your partner, team or external world. Then, you should either comment the code well. But… In the cases, where you don’t want to share the internal code, then you should provide a well written API for that code.

That would save you from many messages, emails and feedbacks, like, “How to do that?”. That question annoys many people because, developer of that API is already aware of the “simplicity” of the API, but others don’t know it. They are not aware of the objects introduced and so on. In such cases, you should always consider documenting the code well, so that others, when face a trouble, can simply read that documentation and say, “Oh, that’s how I do that!”

In many cases, it also helps you when after 2 years, you lose the focus that you had back in those days when you started the project. Happens to me too. 🙂

keep-calm-and-document-your-code
Figure 1: Keep calm programmers! 

How to build a custom documentation tool?

I am sorry to disappoint you guys, but I am going to talk about C# only. There was a lot of time when I was learning other frameworks, writing applications for Linux, compiling articles and books for other operating systems. This is, when I feel I need to get back to where I belong. I belong to C#. I am going to use C# to show you how you can build the application that documents the code that you have written. Now that is somewhat a complex idea and process. But, for the sake of this post, I am going to keep things really very short here and I will demonstrate the use of the very basic concepts to build such a great and vital tool for you team so that they can focus more on the programming part, and leave the documentation part to this tool itself.

I am going to use the following three basic features:

  1. C# language itself.
    • You can use any framework, Console, WPF, WinForms etc.
  2. HTML document for previewing the results.
    • You may use ASP.NET applications or web sites for previewing. I used static HTML pages.
  3. Some reflection.

In the above parts, I think most of you would get yourselves confused when it comes to “Reflection” in C#. Well, it is not that tough part to understand. Reflection in C# (or .NET itself) is a very simple and easy concept to understand. Using reflection, we can simply, get to know the assemblies, objects, classes and their members, on the run-time. In the IDE, we know what is the class name, what are functions defined. But how to know on run-time, is a part of reflection.

Introduction to Reflection

Before, I finally end up the post I want to give you an overview of the reflection in C#. If you have ever programmed in C#, you are aware of, typeof() operator or GetType() function. Both of them are the first steps toward the reflection. Basically, reflection is performed on types of the objects. Types expose the assembly information, members information, properties, functions (methods) and events information… Much more! So, we use the signature to determine many values, like the names, assembly, namespace, versioning etc.

I am going to use the same tool, and I am going to extract the properties from these types and I am going to build an HTML documentation for the classes. This is same mechanism which is used on MSDN or any other “good” documentation. You should never write the documentation yourself, one object after the other. Create an interface which does the underlying task and then do the modifications and reviews.

I would end this section with this one code sample:

class Student {
   public int ID { get; set; }
   public string Name { get; set; }
}

// In the main function
public static void Main(string[] args) {
    var type = typeof(Student);

    // Above line is similar to, 
    var type = new Student().GetType();

    // But prefer the previous one. 

    // We can use the variable to extract the name of the type.
    Console.WriteLine(type.Name);
}

// Output: Student

We get many other similar functions that we may use to actually get the information on the class that we are using.

You should try them out, for further reading please refer MSDN, System.Reflection Namespace.

Building the HTML document

As I have already mentioned that you can use ASP.NET web site, web application too, to represent the documentation for online users. But I used static HTML pages, which are much simpler to build and don’t have to manage the rest of the underlying stuff for the application.

What I did was that I used a C# program to render the HTML content for me. Based on the type that I pass. I created a new class, “DocumentHelper”, and created a function which takes an object and renders the HTML document for its name. Here is what I made:

<!doctype html>
<html>
<head>
   <title></title>
   <style>
      html {
         margin: 0 auto;
         font-family: 'Segoe UI';
         font-size: 13px;
      }
 
      body {
         /* Nothing special here. */
      }

      table {
         min-width: 500px;
         border: 1px dashed #cecece;
         padding: 5px 10px;
         text-align: center;
      }

      table tr:first-child {
         width: 150px;
         font-size: 15px;
         font-weight: 600px;
      }
   </style>
</head>
<body>
   <h4></h4>
   <p></p>
   <table id="properties">
 
   </table>
   <table id="methods">
 
   </table>
</body>
</html>

This is the very basic HTML document, that will be used to render the details for the item. We can then use the C# program to loop over the properties and render them in our HTML document.

If you would consider using C# 6, you would be provided with useful features such as, string interpolation etc.

// Create the instance
StringBuilder builder = new StringBuilder();

// Append html head
builder.AppendLine("<!doctype html><html><head>");

// Append title and the style here
// Append the lines, based on an iterative loop

// Append the final lines
builder.AppendLine("</body></html>");

// Get the document
var htmlDoc = builder.ToString();

You can then store the file, and at the same time, execute the call to show the file too.

System.Diagnostics.Process.Start(linkToFile);

It would open the default application to render the HTML file (if you saved the file with .html or .html extension). In my case, it was Google Chrome. I did not write the table content or anything, but just the simple title and the full name of the object. Whose web page screenshot is:

Screenshot (943)
Figure 2: Rendering the dynamic HTML content.

This way, we can use other classes and their types to render the documentation web pages too.

Points of Interest

In this post, I have talked about the simplest method required to build a tool that automatically documents the code in your project. You can share the HTML documents with your clients who can easily read those documentations based on the content that you have provided based on the UI you use in the HTML document.

Of course this is not complete, this was just the idea that I was having and I am hoping to complete this project as soon as possible and if I do develop, I will share the source code publicly on GitHub.

There are many more things to do:

  1. Learn Reflection
  2. Find a good way to store the HTML documents.
    • In database
    • In static files
    • Other data source
  3. Build a crawler for your API

Crawler would simply crawl from one object to another using the relations and would continue to build the documentation. 🙂

Using C# 6 in ASP.NET 5

Introduction and Background

Previously on my blog, I had talked about the new features of C# 6, I discussed many things about those features as well as I talked about whether those features are “actually” new of just sugar coats. Anyways, no disrespect to the hard work team had put forth in implementing those features and I personally like most of those features. For those of you who are interested in reading that post of mine, please redirect here: Experimenting with C# 6’s new features. I hope you will like the post and consider it to be worth sharing.

In this post, I am going to talk about using those features in ASP.NET 5! I think, this would be my last post about ASP.NET 5, because later I would be talking about ASP.NET Core 1.0 which was introduced as the new name for the technologies from now on. Anyways, until then I am going to use ASP.NET 5 terminology and I will explain how you can use C# 6 features in your ASP.NET 5 applications, to make the processes even better, performance efficient and more readable if you are a team of programmers working together to bring a major project.

So basically, what you are going to learn in this post is:

  1. ASP.NET 5: Not very basics, but enough to allow beginners to understand.
  2. C# 6 features: They have already been discussed, so please read the previous post.
  3. How to improve performance of your web application!

This is another major post of mine, comprising of both ASP.NET and C# topics. Typically, I will use ASP.NET more than I am going to talk about C# itself so that web developers can gain some benefit from this post of mine. So let’s get started…

Using C# 6 features in ASP.NET

What we have in ASP.NET is just a framework used for building web applications. C# is just the language, that we can use to program the applications. However, the smoother, efficient and efficient the programs there would be, the better your web applications would perform. C# 6 is the latest version of C# programming language and would definitely use Roslyn compiler. You can use this language in your previous versions of ASP.NET, like ASP.NET 4.5. But for the sake of this post, I am going to use ASP.NET 5!

ASP.NET 5 itself is very fine tuned… But using the power of C# 6, you can make it even better. In this post, I am going to show you a few methods that you can use C# 6 in. I will start in the similar manner that we had previously (in the previous post) and I will explain the code usage in the terms of ASP.NET web application development scenarios, instead of simple C# programming.

String interpolation

Personally, I am a huge fan of this feature because I have waited for this feature for a very long time. I have always been using string.Format function or StringBuilder objects to generate the strings, but using this feature I can easily write the messages that I want to write…

Now, when you are going to write the strings using dynamic data from the users. I would recommend that you write them using the string interpolation. Like this,

var message = $"Hello {Username}, you have {count} unread messages.";

// Then you can use this value in views, or back-end model management, or in HTML
<p>@message</p>

This way, you won’t have to generate the string representations using concatenations, or to create the string builders. I have already demonstrated that this method is similar to what we had as String.Format() function! Only that this method is much better. A real world example of this usage is, that ASP.NET provides interfaces that you can use to trigger SMS and Email notifications. While previously you had to write the following code:

var message = string.Format("Hello, {0}! Use {1} as your code to activate the service.", username, token);

// Send the code through SMS or email services

Basically, that is a good approach, mostly developers use concatenation. Which is a really very bad approach to build strings. Instead now you can do the following:

var message = $"Hello {username}! Use {token} as your code to activate the service";

This is a really very short way of building the strings, and guess what? They always translate down to string.Format function calls. 🙂

Conditional try…catch

Now, I have been mostly watching the source codes of programmers to be like:

try {
   // Code that may raise exception.
} catch (Exception er) {
   if(er is NullReferenceException) {
      // Log this null error
   } else {
      // Chain the exceptions or just leave...
   }
}

What this is, that it would always enter the catch block. Then, inside that block you would be checking the condition that you want to check. So, in C# 6, you can make it even more readable. You can change that code to be like this:

try {
   // Code that may raise exception.
} catch (Exception e) when (e is NullReferenceException) {
   // Execute this block in case the error was "null" reference.
} catch (Exception e) when (e is UnauthorizedAccessException) {
   // Execute this in case the exception was this one..
}

// You can chain the exception conditions...

This way, you can allow the exception to propagate back if you are not interested in logging the error on your end. The condition would be checked against, and then it would continue to next statement if the condition is not met.

nameof operator

In ASP.NET environment, I think this variable would have the most use! How? Most of the times, developers have to “guess” the variable and then write its own “hardcoded” name. For example like this,

string name = null;

// Now when you will call any function on name, 
// it would raise exception. Like:
int length = name.Length;

// Before C# 6, you would do:
// inside catch block 
var message = "Sorry, name was null.";

That is OK! There is no problem with this one… But, what if you later refactor your code and change the name of that variable? Even if the changes are not going to be reflected on the production environment, you are still going to use the details on your development environment. So what you would have to do is that you would have to change these string literals too, just to depict the changes in the system.

Well, C# 6 got you covered for that. You can now know which variable was the problem in your code.

string name = null;

int length = name.Length;

var message = $"Sorry, {nameof(name)} is null.";

That is same to what we had previously, but what is difference? The difference is that now you will be able to refactor the variable. By refactoring, previously, you would have to edit the strings too, instead in this method, while refactoring the variable names would be updated throughout and nameof() operator would return the “current” name of that variable! Also, if you were making a model and then rendering it…

class Model {
   public string Name { get; set; }
   public string Email { get; set; }
}

// You could do this:
var message = $"{nameof(Email)}: {Name}, {nameof(Email)}: {Email}";

Fully using the power of C# 6!

Null conditional operator

What I have seen in most of the cases, in my experience is that beginners typically get stuck at “NullReferenceException”! Anyways, what I think is that this error is very helpful in many cases and I suggest that you become a friend with this error, as it can be really very helpful in many cases. (Which cases? That requires a separate article post!)

You can then basically minimize the error if the error is to be null reference object. To do that you just append “?” to the variable name, and if that object is null at the time of execution, C# won’t throw an exception instead it would store null in turn.

string message = null;

var length = message?.Length;

In the previous case, it would throw an exception. However, in this case there won’t be any exception. But there is another “exception” to this use. I have already talked about that exception, the thing is… Your “length” variable is now also null, so if you would try to use that variable, it would then raise another error unless you use the same condition to override it.

I recommend that you read the same section in my previous post, and see how this operator “is” useful and how this operator “is not” useful at all.

Auto-properties

In ASP.NET, Models are typically just structures. You don’t have any default value in them, but if you would want to design your structures to hold a default value that you want to display when user is opening the form. You can do so like this:

class SomeForm {
   public string Name { get; set; } = "Your name.";
   public string Email { get; set; } = "youraddress@example.com";
   public string Message { get; set; } = "Enter your message here.";
}

When you would now render these as form elements, you are going to get these by default. You usually enter these in the HTML, hardcoded form. Instead, using this approach you can get a consistent and dissected environment in which you can later focus on the model itself, later.

You can also use the same for getter-only properties. The getter-only (or readonly) fields can also be initialized in the same manner:

public Helpers {
   public static string SMTP { get; } = "smtp.example.com";
}

This would allow you to manage the value in this one line itself, instead of using a constructor to initialize it with a value.

Lambda use in ASP.NET

If not string interpolation, then I am a huge fan of lambda expressions! These expressions come from the realm of functional programming. The benefit of them is that they don’t have any side-effects. By that, I mean that the function is just the evaluation of the values and then the values are returned instead of having a stack created for the function itself.

public int Multiply (int a, int b) { return a * b; }

This can be minimized to the following code,

public int Multiply (int b, int b) => a * b;

There are two benefits to having this.

  1. The code looks more readable.
  2. There is no more stack!
    • The code is evaluated and the value is returned.

So not just this improves the code readability, it also improves the performance of the code! You can try that out, and just to see the working, you should read the previous post.

Another good use of lambdas is in getter-only auto-properties! Old versions of the properties always relied on a backing field. These fields were then called to provide or set the values. However, that caused an extra call to be raised to the backing field. What lambda expressions have is that you can write a field like a  lambda, just as we know that lambda expressions don’t work around with other fields, this way… The lambdas would help us to develop readonly fields in a much better way.

So, for example, if you create a property like this:

public string Name { get; } = "Afzaal Ahmad Zeeshan";

What this is going to do is that it would create a backing field, then this value would be stored to that backing field. In turn, whenever you would call this property, it would then call the backing field to get that value. Another call would be made.

Instead, using lambda expressions you can do this:

public string Name => "Afzaal Ahmad Zeeshan";

What this has as a benefit is that,

  1. Since this is a readonly property:
    • You are not going to update it later.
    • You provide a default value in this.
    • It acts just like a constant field.
    • No overhead calls.
  2. More readable code!

Lambdas not just make your functions better, it also makes your (readonly) properties better! Technically, you can improve the performance of your applications.

Points of Interest

I have not yet covered all of the features that C# 6 introduced, why? Because most of them are not going to be used by “average” developers and only a number of people would be using them. A few of such cases is

  1. Index initialization in the dictionary.
  2. Parameterless constructor of struct type.
  3. So on…

However, this post would help you to understand the use of C# 6 features in ASP.NET web applications. You have already read that not just this improves the syntax, instead it also makes the application perform much better.

I would personally recommend the following uses to be made “must have” in your web applications:

  1. String interpolation
    • Makes your string much more readable.
    • String template can be edited easily.
    • Translates to the better method of generating the strings.
  2. Lambda expressions
    • You have read that lambda expressions make your functions more efficient.
    • The getter-only auto-properties are more like constant fields.
    • Auto-properties are much more readable.

These were a few of the tips that I wanted to give to those ASP.NET web developers who are going to use Roslyn compiler and are going to make use of C# 6 langauge. If you are into C# 6, I “recommend” that you make use of these cool features.

Later, I will share some more of the same tips and recommendations, once I have finished recording them for you. 🙂

Guide for building C# apps on Ubuntu: MonoProject Introduction

Introduction and Background

Actually, I was willing to write a book on this topic, “Programming C# on Ubuntu!” but I think for the overzealous crowd, I may just write a small blog post for the upcoming book of mine! C# has been one of the favorite languages of mine ever since I started programming and Ubuntu is another interesting software piece that I love! I did write a post talking about cross-platform programming using C# and it did cover most of the things a C# programmer should know when it comes to writing a project that needs to be executed on multiple platforms and frameworks. In this post, I will talk about a few of the things that developers usually require when they are building applications in C#. Many things, like

  1. Syntax highlighting.
    • I don’t doubt that high-level programmers and their efficiency is related to the syntax highlighting and the color of their code!
  2. Project and solution management.
  3. Compilers and builders.
    • Usually, Ubuntu or Linux environment don’t come shipped with a “full-featured” IDE like Visual Studio, that most C# programmers are fond of.
    • I will talk about the “full-featured” IDE, which has everything!
  4. Debuggers.
    • You don’t want to publish the buggy code to public now, do you? 🙂
  5. Rest of the stuff in C#!

Although this is just a short snippet of “content” that I actually want to write, it would still have enough juice for you to get started programming applications in C#, in no time. But first things first, did you go and read my article about cross-platform programming in C#? If no, please go and read it at, Using C# for cross-platform development. In that post I talked about C# itself and how C# would be intuitively executed on the Ubuntu environment. In this post I will talk about the IDE, features and services and then I will talk about a few core concepts of programming using C# or managed environment. In a managed environment, most of the hard-work is left to the IDE and developers are left to “just” think about the logic. That is what I am going to talk about in this blog!

Settings up the environment…

I did talk about the environment setup in the previous post, so anyways just to continue from there. The process is a bunch of small code blocks and snippets to be executed in the shell (terminal in Ubuntu terms). What we are going to install, is Mono Project’s IDE and the package includes everything that we may need to develop a C# program for Ubuntu.

Following sections would contain the resources and help tips for C# developers who want to port their applications on Ubuntu. Currently, just install the Mono Project and… Remember to install the Mono Project’s IDE, they are two different things.

First steps first, open up the terminal in your Ubuntu, (it may be different in your Ubuntu as Ubuntu itself has multiple flavors and distros).

Screenshot (5228)
Figure 1: Terminal emulator in All applications dropdown.

I am using Ubuntu Studio so it looked something like that, yours may be on the left-side or at the bottom or what-ever! Open it up and enter the following commands to install and setup the environment for C# programming on Ubuntu.

The first step would be to add the repository to your Ubuntu system, because initially Ubuntu doesn’t know about the location to capture the Mono Project from. So you need to set up the repositories first.

sudo apt-key adv --keyserver hkp://keyserver.ubuntu.com:80 --recv-keys 3FA7E0328081BFF6A14DA29AA6A19B38D3D831EF
echo "deb http://download.mono-project.com/repo/debian wheezy main" | sudo tee /etc/apt/sources.list.d/mono-xamarin.list
sudo apt-get update

Add your password to the stream and continue. This would add the repository to your system, plus it would check up for the repository packages for any updates (won’t install!) This is just the start…

Got a different Linux?

Mono Project is available on Linux (of course, that is why we are using it on Ubuntu!) and that is why, any Linux distro can use it. If you have a different Linux distro you may just want to visit the attached link (below), because different Linux distros would definitely have a different flavor of syntax for their terminals and shells.

Install Mono on Linux

Step 2 is to install the Mono Project itself. Mono Project is a collection of C# compilers, Mono packages, dependencies and other tools, like command-line instructions and debuggers. Mono Project has a very handy command to install, entire set of components and binaries on the system. Just execute the following apt command.

sudo apt-get install mono-complete

This install the Mono Project and the required components, not just the compilers and “teeny tiny” stuff around. At this step, you have Mono installed, but only through command-line and terminal. If you want to make use of a full-featured IDE, continue to the next command. It is also recommended to use Mono Project’s IDE, as it would be much simpler and handy while using the IDE instead of the command-line.

sudo apt-get install monodevelop

This would take a (very long; depending on your machine and internet connection) while. Once this finishes, you can start the IDE and start using it for C# programming. To run the IDE, you can either select the symbol from the list of Applications installed:

Screenshot (5229)
Figure 2: MonoDevelop and Mono Documentation in the list of All Applications under Development category on Ubuntu Studio.

These are two different things! Let me talk about these two things separately.

MonoDevelop

MonoDevelop is the IDE (Integrated development environment) used to build, edit and deploy the C# applications. It is what we are usually going to use here.

Mono Documentation

Ever stumbled upon a hard task? Ever visited MSDN for help? This is the MSDN in Mono edition here. It contains the documentation about the assemblies, languages (specifically C# language) and other required information. You would usually look in this to get help.

Coming back to the thread itself… You can also start the IDE from the command-line, to start the IDE just execute the following command in your terminal:

monodevelop

Remember? This is the IDE for Mono! The IDE would look like this,

Screenshot (5230)
Figure 3: MonoDevelop IDE active on Ubuntu Studio.

This is it for this section, read the rest of the post for the discussions about different features of this IDE for C# programming. In many ways, MonoDevelop is similar to Visual Studio, but wait up guys, Visual Studio is Visual Studio! MonoDevelop has successfully bridged the cross-platform development using C#, I would give them this. Their environment is also great, and the performance this has is also amazing. You would love to use MonoDevelop on Ubuntu, if you are a C# fan.

Discovering the MonoDevelop

MonoDevelop is an IDE containing many tricks up its sleeves used regularly by developers ranging from small tools like text-editors, to very powerful tools like profilers and debuggers. All of these tools are used by C# developers to fine-tune their programs. In this section, I am going to demonstrate the use of MonoDevelop for C# programming on Linux environment, using Ubuntu Studio distro. This is not about programming, I will cover that in a later post, instead in this post I will cover the typical software features available for C# developers in this package.

Learning the interface is the first step toward any essential programming environment. If you are unaware of the tool that you are using or the services that you are going to get while using the tool, chances are that you are not going to get that much efficiency while programming in that particular tool. And this is the very common factor that makes (or forces) the companies to select a particular tool over another and so on. C# programmers are primarily focused on Visual Studio (and personally, I also enjoy using Visual Studio only because that is one of the greatest IDEs out there). C# programming is however not bounded to the Windows itself, since it can be programmed on multiple platforms then it should be also possible for the developers to be able to use the tools there. C# was not officially declared to support cross-platform support and in those days, Mono Project stood out and started to compile the C# programs based on ECMA standards for the Linux environments and then on the Mac OS itself. This led developers to write their C# programs, which would “surely” run on multiple platforms, before C# this would be a job to Java programs, whose bytecode would be transferred in the Jars to multiple platforms and then it would be executed on those platforms using the Java’s virtual machine support on those platforms.

Roughly speaking, all of this was just the ideology that led the Mono Project to be successful, because at least in my opinion, C# is much better programming language and the .NET framework is much more extensible, flexible and portable framework to be programmed for as compared to Java programming language or the core Java APIs.

The main page of Mono Project says,

Screenshot (5233)
Figure 4: Mono Project’s home page.

Now, counting the few of the many features that Mono Project would provide you with.

1. Creating a new project

Creating a new project in MonoDevelop is a very smooth and easy process. You just need to select a template, enter a few details and you are done! The main page for creating a new project in MonoDevelop is something like…

Screenshot (5236)
Figure 5: C# project templates.

Yes, you have seen it. MonoDevelop also supports ASP.NET web application development and I will cover that in a separate post, in near future. Just for the sake of a preview, have a look at the following templates, that are provided:

Screenshot (5237)
Figure 6: ASP.NET application templates.

MonoDevelop also supports C and C++ programming, but that is not the talk right now. For this blog, we will simply select C# and a Console application as the template. We simply need to add a few details like:

  1. Name of the project.
  2. Location for the project.

Screenshot (5241)
Figure 7: Configuring the project.

Then we’re done! We will then get our project open, and we can continue exploring the rest of the stuff there.

2. Solution explorer

First and foremost thing that a developer would stumble upon is the solution explorer. Solution explorer typically contains the project files, resources and other references and properties for the project that you are currently working on. The solution explorer in MonoDevelop is similar to what we have in Visual Studio in many ways…

Screenshot (5243)
Figure 8: Solution explorer in MonoDevelop.

This resembles Visual Studio in many ways, we have a solution name, a project name. Not just that, we are provided with:

  1. References
    • Used to manage the references in our project.
    • Can be used to add new references and assemblies to be called using the “using” directive.
  2. Properties
    • Used to configure the properties about the project, a few compilation and build-time editions and so on.
  3. Program.cs
    • This is our main program in the project.

So far, we have just viewed it. What about the options? The options are also (very much) similar to what we have in Visual Studio. We can add new items, manage the tools, manage extensions and much more all in the IDE itself.

Screenshot (5244)
Figure 9: Menu in the project context of the MonoDevelop IDE.

I am not going to talk about the new files, but I will definitely talk about NuGet package management, but in coming sections later. We can use these options provided here to perform many actions, like building the project, cleaning it or to add more files and resources to the project.

3. Running the project

Running the project can be categorized in two different sections:

  1. Debugging
  2. Releasing

MonoDevelop has tools for both of these settings, you can debug your application as well as run the application in release mode. In debug mode, a debugger is attached to the process for catching the exception and to set breakpoints in the applications.

Screenshot (5245)
Figure 10: Debug and Release mode for executing the program.

You can select either one of these configuration and then run the application by pressing F5. Although, I had to talk about the properties and configurations of the project a bit later, but anyways you can change the configurations, add them, remove them from the project by opening the properties and then altering the settings there:

Screenshot (5246)
Figure 11: Editing the configurations for the project. 

You can then run the project in that mode, typically you can edit the CPU architecture that your program would run on; x86 or x64 editions.

4. Managing the references

One of the most important, most used and most critical part of C# programming is the references to the assemblies. Without most assemblies, your program won’t run, simply! Managing the references is a very easy task in Visual Studio as well as in MonoDevelop. Initially, our program just includes the reference to the System assembly,

Screenshot (5247)
Figure 12: Assembly reference window in MonoDevelop.

On the left side, a list of the assemblies from project or from packages or from .NET are available. While on the right side, currently selected assemblies are shown. If we include more references, more items would be shown in this list. So, let us include the famous Newtonsoft.Json assembly and see what happens.

Screenshot (5248)
Figure 13: Selecting a new reference from the references window.

A new reference can be seen in the right side and we have just selected the assembly reference in the left side. Once you click select, it would be added to your project.

Screenshot (5249)
Figure 14: Newtonsoft.Json assembly reference added to the project.

Pretty easy, though. You can include more reference from the projects too. That is not it, if you pay attention, you can see that you add web references too, you can manage NuGet packages too, all in the IDE itself!

Screenshot (5250)
Figure 15: Options to add references to your project.

You can use them to manage the references in your project.

5. Configuring the IDE and Project settings

Finally, I would like to talk about the IDE configurations, compiler settings and a few other editor settings that you may be interested in, just to make sure you feel at home! By default the look and the feel of the IDE won’t be suitable, and if you want to edit the look and feel of the text, you can “surely” change it.

You can manage the compile time settings, you can also sign the assembly in these settings. The settings are something like below:

Screenshot (5251)
Figure 16: Project options window.

The settings are categorized further. You can manage and edit the settings under each category.

  1. Build
    • Holds the configuration for the project. Like running unsafe code.
    • Holds the configurations for running the project.
    • Holds the tools to sign the assembly digitally.
  2. Source code
    • You can alter the look and the feel of the code editor.
    • Allow to perform intelligent code editing features.
  3. Rest of the deployment and running stuff.

You can also manage many other things like the location of the project, where does the compiled binaries get places on the machine. You will find most of the settings right here. Then you can edit them and manage your project to run in multiple scenarios.

Points of Interest

This is one post in the series of articles for C# programming on Ubuntu operating system. This post covers the usual scenarios, tools and features that C# programmers typically look for in an IDE. The post doesn’t cover much about programming, but tools used in programming.

This was just the introduction post for C# programmers who want to start up programming C# on Ubuntu operating system. In upcoming posts, I will talk about:

  1. C# language “quickies”
  2. C# project management and deployment.
  3. NuGet package management.
  4. Tips for refining the code and so on.

Stay tuned, there is a lot more to come… I will also publish a book, “Programming C# on Ubuntu” and, well, that’s it for now. 🙂

Creating a “customizable” personal blog using ASP.NET

Introduction and Background

I don’t want to speak too much in this piece of article, instead I just want to demonstrate the presentation that I have to make today. This article is a short piece of “long report” that can be considered as an answer to most common question, “How to create a blog in ASP.NET?”

Well, I find it most compelling that most people are unaware of what a blog itself is, because if they knew they could just play around with ASP.NET to build one for themselves in a night or two. In this article I will discuss a few steps that are needed to be followed while creating your own blog. I am not a good designer, so please forgive the most annoying design that you are going to witness in coming sections. But I promise I will give you an overview of a “blog in ASP.NET”. The facts that I will talk about, or the reason that you should read this article is that this article is not a “specific” how to for my own procedures. Instead, I am writing this article to give you a brief overview of what a blog is, what ASP.NET has in it for you, how you can create it and not just that, but also, how you can create a blog with all that you have. In most cases, you just have a small area for hosting with less HDD space and no database. I will cover what to do in such cases too. Just read the post.

To add some “content” I wrote a Windows 10 client application to consume the blog posts through ASP.NET Web API. I am sure in most cases this Web API thing for ASP.NET blog posts would interest you.

What is a blog, anyways?

Putting the content here simple, a blog is a place where you can share, what you want, anytime you want, with anyone you want! That is a general type of blog being used. Blog is a short form for weblog (logging, makes sense?). More specific types of blogs come depending on your content. Some of blog categories are as below:

  1. Microblogs
    Compact and straight-forward blogs. 140 characters beast, Twitter, is an example of this type.
  2. Personal blogs
    Anyone can create them and they are very much personal, demonstrating only one person. Your website can be your personal blog.
  3. Media blogs
    You can share the images, videos and other multi-media content in media blogs.

So basically a blog is just a website for sharing the content. If you ever created an online website for sharing the content, current work information, regular “diary”, then you have already worked on developing a personal blog. Blog is just a term given to online log system, where you can “log” your regular discussion topics.

So, in this article post I am going to cover a basic application that can act as a blog for someone. As an additional support I will also give you an idea of using ASP.NET’s Web API to promote your blog on native applications, such as a native Windows 10 application that loads the content from your only blog and display the blog posts to users natively.

Getting started with ASP.NET

Since most of the readers are currently not upgrading themselves to ASP.NET MVC 6, I will use ASP.NET MVC 5 (not ASP.NET 5) to show you how to do it. Things are very much similar in ASP.NET MVC 5 and ASP.NET MVC 6. The common things that I have found to change in the coming versions is that ASP.NET is now cross-platform, so if you continue to write the same application by following my article, in ASP.NET MVC 6, you will be able to run it on a server in Ubuntu, or Mac and so on. But that is not a big deal here, is it?

I will be using ASP.NET MVC 5 (not ASP.NET 5!) to demonstrate how to build your own ASP.NET personal blog. But before I get Visual Studio started, I wanted to explain the term “customizable”, which is used in the title of my current article. By the term “customizable” I mean

  1. A blog that is entirely flexible. You can integrate plugins, or update the theme and so on.
  2. A blog that doesn’t rely on a specific third-party framework, even a data source.
  3. A blog that is built just on top of ASP.NET assemblies and doesn’t require you to do anything at all.
  4. A general blogging platform, which can be then altered to create
    1. Social blogging service.
    2. Personal CV house
    3. Your own website to demonstrate your services
    4. So on and so forth.

In simple, the blog can be altered to your own needs and requirements. After all an ASP.NET blog is just an ASP.NET web application that you have modified to suit your own needs.

At this stage I would ask you to create a new ASP.NET project in your own machine, in the next section I will continue with the next things, like create controllers, defining the Views and so on. So, it would be good for you to create a new project at this moment and continue with the article next.

Building the application

First of all, I would like to share how I actually built the ASP.NET web application to be able to host my blog. I am going to use a web interface and an API interface, to be able to consume the blog from multiple native applications. So, I will talk about the ASP.NET programming in this section and then I will talk about the Windows 10 application programming, to actually consume the blog posts and show it to the users in a “native experience”.

Web interface controller

First of all, I will consider building the web interface to be able to showcase the blog on the internet, using a browser. This is what ASP.NET was initially developed for. To build web sites, and web applications. Web applications were introduced a bit later and then was introduced the Web API and so on. So, I am going to use the very basic concepts of ASP.NET MVC to build a simple web application, that can “act” as a blog.

If you are novice to ASP.NET, because most of the times the question (in the title) is asked by a beginner in ASP.NET, so if you have no idea about ASP.NET, please read the previous posts of mine that cover ASP.NET in a great detail and would help you in understanding and learning every bit of ASP.NET programming, as from a beginner’s perspective.

  1. Understanding ASP.NET MVC using real world example, for beginners and intermediate
  2. Novice to MVC? Read this… (ASP.NET MVC is implementation of MVC pattern of software development, this post talks about MVC not ASP.NET MVC)

I will continue to share more of my articles and posts, as the topic proceeds. I would recommend that you read the above posts if you are new to ASP.NET, most of the concepts like Controller, Views and Models may cause a confusion to you, if you are a newbie!

Almost there…

I am very much fan of JSON data, I prefer using JSON over SQL databases and thus I am a fan of Newtonsoft.Json library. So, please consider installing the library before moving further. This library would be the backbone for our data source.

PM> Install-Package Newtonsoft.Json -Version 7.0.1

Once this package gets installed, please continue to the next section.

1. Build the model for application

In my case, I always prefer building the models first. This gives me an idea of building the controllers and then building the views for the application. So, I would also give you a tip, to always build the models, data structures first and then continue to build the rest of the stuff.

The model we need is just a model for the blog post. So, the structure would just be as easy as the following,

using System;
using System.Collections.Generic;
using System.Linq;
using System.Web;
using System.IO;
using Newtonsoft.Json;

namespace PersonalBlogTemplateWithServices.Models
{
     public class BlogPostModel
     {
         // General properties
         public int ID { get; set; }
         public string Title { get; set; }
         public string Content { get; set; }
         public List<string> Tags { get; set; }

         // Time based properties
         public DateTime CreateTime { get; set; }

         // Other properties and settings may include UserID, RoleID etc.
      }
 
      // The class to manage the data-sources
      public class PostManager
      {
          // Define the members
          private static string PostsFile = HttpContext.Current.Server.MapPath("~/App_Data/Posts.json");
          private static List<BlogPostModel> posts = new List<BlogPostModel>();

          // The CRUD functions
          public static void Create(string postJson)
          {
              var obj = JsonConvert.DeserializeObject<BlogPostModel>(postJson);

              if(posts.Count > 0)
              {
                  posts = (from post in posts
                           orderby post.CreateTime
                           select post).ToList();
                  obj.ID = posts.Last().ID + 1;
              } else
              {
                  obj.ID = 1;
              }
          }

          posts.Add(obj);
          save();
      }

      public static List<BlogPostModel> Read()
      {
          // Check if the file exists.
          if(!File.Exists(PostsFile))
          {
              File.Create(PostsFile).Close();
              File.WriteAllText(PostsFile, "[]"); // Create the file if it doesn't exist.
          }
          posts = JsonConvert.DeserializeObject<List<BlogPostModel>>(File.ReadAllText(PostsFile));
          return posts;
      }

      public static void Update(int id, string postJson)
      {
          Delete(id);
          Create(postJson);
          save();
      }

      public static void Delete(int id)
      {
          posts.Remove(posts.Find(x => x.ID == id));
          save();
      }

      // Output function
      private static void save()
      {
          File.WriteAllText(PostsFile, JsonConvert.SerializeObject(posts));
       }
    }
}

In the model , I have the following attributes that can be used to identify or describe the blog post at the instance.

  1. ID
  2. Title
  3. Content
  4. Tags (is an array; List)
  5. CreateTime (used to sort the items)

Great, we now have a model, and now we can continue to write the rest of the logic for our application. The model implements the CRUD functions, that we can call from external objects, from both, web interface and from Web API interface. This would allow us to manage the data layer in this class.

2. Creating the controller

Alright, first of all, create the controller. The controller would have the actions that we need to perform in our blog. Please pay attention to the following code:

using System;
using System.Collections.Generic;
using System.Linq;
using System.Web;
using System.Web.Mvc;

using PersonalBlogTemplateWithServices.Models;
using Newtonsoft.Json;

namespace PersonalBlogTemplateWithServices.Controllers
{
    public class BlogController : Controller
    {
        // GET: Blog
        public ActionResult Index()
        {
            // Read the list
            var blogs = PostManager.Read();
            if (blogs == null)
            {
                 ViewBag.Empty = true;
                 return View();
            }
            else
            {
                 // Just for sorting.
                 blogs = (from blog in blogs
                          orderby blog.CreateTime descending
                          select blog).ToList();

                 ViewBag.Empty = false;
                 return View(blogs);
            }
        }
 
        [Route("blog/read/{id}")] // Set the ID parameter
        public ActionResult Read(int id)
        {
            // Read one single blog
            var blogs = PostManager.Read();
            BlogPostModel post = null;
 
            if(blogs != null && blogs.Count > 0)
            {
                post = blogs.Find(x => x.ID == id);
            }

            if(post == null)
            {
                ViewBag.PostFound = false;
                return View();
            } else
            {
                ViewBag.PostFound = true;
                return View(post);
            }
        }

        public ActionResult Create()
        {
            if (Request.HttpMethod == "POST")
            {
                 // Post request method
                 var title = Request.Form["title"].ToString();
                 var tags = Request.Form["tags"].ToString().Split(new char[] { ',' }, StringSplitOptions.RemoveEmptyEntries);
                 var content = Request.Form["content"].ToString();

                 // Save content
                 var post = new BlogPostModel { Title = title, CreateTime = DateTime.Now, Content = content, Tags = tags.ToList() };
                 PostManager.Create(JsonConvert.SerializeObject(post));

                 // Redirect
                 Response.Redirect("~/blog");
            }
            return View();
        }

        [Route("blog/edit/{id}")]
        public ActionResult Edit(int id)
        {
             if(Request.HttpMethod == "POST")
             {
                 // Post request method
                 var title = Request.Form["title"].ToString();
                 var tags = Request.Form["tags"].ToString().Split(new char[] { ',' }, StringSplitOptions.RemoveEmptyEntries);
                 var content = Request.Form["content"].ToString();

                 // Save content
                 var post = new BlogPostModel { Title = title, CreateTime = DateTime.Now, Content = content, Tags = tags.ToList() };
                 PostManager.Update(id, JsonConvert.SerializeObject(post));

                 // Redirect
                 Response.Redirect("~/blog");
             } else
             {
                 // Find the required post.
                 var post = PostManager.Read().Find(x => x.ID == id);

                 if (post != null)
                 {
                     // Set the values
                     ViewBag.Found = true;
                     ViewBag.PostTitle = post.Title;
                     ViewBag.Tags = post.Tags;
                     ViewBag.Content = post.Content;
                 }
                 else
                 {
                     ViewBag.Found = false;
                 }
             }

             // Finally return the view.
             return View();
         }
    }
}

The above code, is enough! This code contains the code that you may be needing. Now, I think I need to explain the code a bit.

I have implemented the CRUD functions, in this manner, I created the functions that would allow me to create a new post, read the list of posts, read a single post at the web page or perform other functions, like update the post. You can also see, that most of the codes and functions are being called from the model. That is why, I designed the model before I created the controller. I think now you understand the importance of a model before controller.

The controller would simply capture the request, extract the data from it and then pass the data and request over to the Model. The model would then perform as per our request and return a response, which can then be sent back to the client. The purpose of such a design, is to create a web application being consumed over by Web API too. In the later sections I will consider sharing that too.

Until now, the web application is able to show us messages on the blog. If we have created a post, it will show us the post otherwise it will show us a message that there is no post currently available.

3. Creating the views

Views are simple enough to be understood easily! If you have been developing using HTML, I won’t explain them. If you haven’t, go learn! 🙂

Default page…

The default page for the blog would be simple one, it would either enlist the blog posts otherwise show a message.

For this page, I would instead show the HTML code, and for the rest of the pages I will show the images, because I want to demonstrate how to use the actions.

@model List<PersonalBlogTemplateWithServices.Models.BlogPostModel>
@{
    ViewBag.Title = "My Blog";
}

@if(ViewBag.Message != null)
{
    <h4>@ViewBag.Message</h4>
}

@if(Model == null || Model.Count == 0)
{
    <h4>Blog empty</h4>
    <p>Either under development, or author is busy. Visit back again later! :-)</p>
    <a href="~/blog/create">Create new post</a>
}
else
{
    <h4>My blog</h4>
    <p>Read my blog posts below...</p>
    // Content is available.
    <a href="~/blog/create">Create new post</a>
    foreach (var post in Model)
    {
       int tagIndex = 1;
       <h4><a href="~/blog/read/@post.ID">@post.Title</a></h4>
       <p>
       @foreach (var tag in post.Tags)
       {
           if(tagIndex == post.Tags.Count)
           {
               <span class="tag"><a href="~/blog/tag/@tag">@tag</a></span>
           }
           else
           {
               <span class="tag"><a href="~/blog/tag/@tag">@tag</a></span>
           }

           tagIndex++;
       }
       </p>
   }
}

The page uses the conditional values from the controller. You may have noticed the value from Controller, which is passed as a model (of type of the BlogPostModel). I have checked against that, to see if there are any posts in the data source. That is pretty much simple and straight-forward. The main thing to see, if what happens if there is a new post in the data source. Consider the next section, please!

Creating the post

When you create a new post, you follow the hyperlink, which takes you to a page where you have created a form and so on. I am not much a designer-type, so the UI is very ugly. You can make it better if you want to.

The view for “C” in “CRUD, is something like this.

@{
 ViewBag.Title = "New Post";
}

<h2>Create new blog post</h2>

<form method="post">
    <label>Title</label>
    <input type="text" name="title" style="" class="form-control" placeholder="The headline goes here..." /><br />
    <label>Tags</label>
    <input type="text" name="tags" style="" class="form-control" placeholder="Separate each tag using a comma ','." /><br />
    <label>Content</label>
    <textarea name="content" class="form-control" style="height: 300px;" placeholder="What would you like to write?"></textarea><br />
    <input type="submit" style="width: auto; font-weight: 600;" value="Post" /><br />
</form>

Very simple though, yet powerful! Power is in your hands. Add some, or leave it if you do not want to share the admin panel with anyone. 🙂 Once this page gets loaded, it takes the following web page shape.

Screenshot (219)
Figure 1: Create a new blog post page. Form is filled.

The above HTML takes this shape. The HTML looks clean because of hard work of

  1. ASP.NET team for providing a template.
  2. Bootstrap guys, Twitter bootstrap is being used here (is provided along with ASP.NET template)

You can now submit the post. Alright, until now things are pretty neat and simple. Do you have any questions? Please re-read this section. 🙂

Reviewing the default page now

If you go back to the default page now, you will see that the blog would now enlist the posts (currently only 1). The following is the image, you already have the HTML for this page.

Screenshot (220)
Figure 2: Default page showing one blog in the list. 

Now the page is able to demonstrate that we have a post, it displays the tags and name. Nothing else. After all, why would we show anything else on the default page?

Reading the blog posts, one by one

If you could read the HTML for the default page, you will see that the title of the blog post is actually a URL to the blog post, to be read. I have created the action for that (please read the controller code for Read action). This would let us now read the content,

Screenshot (221).png
Figure 3: Reading the post, shows date time, content and tags. 

This is how I display the content. I agree, a very bad design. But I am very bad at designing the web applications. (I know, my first attempt went wrong because IDs were null and… Ah, you get it the second time, didn’t time? Quit whining!)

I used the following HTML code for this, the thing was that I just wanted to display the blog post, in a very simple way. Indeed in your case, you will write something much more useful. But, at the moment, just read this.

@model PersonalBlogTemplateWithServices.Models.BlogPostModel
@{
    ViewBag.Title = Model.Title;
    var tagIndex = 1;
}

<h4 style="font-weight: bold;">@Model.Title</h4>

<p>@Html.Raw(Model.Content.Replace("\r\n", "<br />"))</p>
<p>Posted by &mdash; Afzaal Ahmad Zeeshan &mdash; on @Model.CreateTime.ToString("MMMM dd, yyyy 'at' hh:mm tt")</p>
<p>
    Tagged under:
    @foreach (var tag in Model.Tags)
    {
        <span class="tag"><a href="~/blog/tag/@tag">@tag</a></span>
        if (tagIndex == Model.Tags.Count)
        {
            // In the end, write the edit hyperlink
            <span><a href="~/blog/edit/@Model.ID">Edit</a></span>
        }

        // Finally increment the index
        tagIndex++;
    }
</p>

So, this code would give us the post. I have many things hardcoded, like, “Posted by &mdash; Afzaal Ahmad Zeeshan &mdash; on {Date Time}”. You can change it, to see who is the author and so on. There are many other things to be taken care of.

One thing to understand is that your HTML is not the same that gets saved in the data source. So, you might need to re-consider the HTML, then render it using Html.Raw function. Have a look at the following code, for example,

<p>@Html.Raw(Model.Content.Replace("\r\n", "<br />"))</p>

Now, each of the occurrence of “\r\n” would be replaced with the breakline object in HTML. This way, you can re-build the HTML and show it as plain text on the HTML web page.

Updating the posts

The final concept that I will be talking about here would be of updating the posts. Updating is similar to creating the new post, but just that you also provide the previous data that you are having. Title, content and other stuff can be provided and then user is allowed to update them as required and then you save it back to the data source.

I have used the same HTML form in this case,

@{
 ViewBag.Title = "Edit the post";

 var tags = string.Join(", ", ViewBag.Tags as List<string>);
}

<h2>Edit the post</h2>

<form method="post">
    <label>Title</label>
    <input type="text" name="title" style="" class="form-control" value="@ViewBag.PostTitle" placeholder="The headline goes here..." /><br />
    <label>Tags</label>
    <input type="text" name="tags" style="" class="form-control" value="@tags" placeholder="Separate each tag using a comma ','." /><br />
    <label>Content</label>
    <textarea name="content" class="form-control" style="height: 300px;" placeholder="What would you like to write?">@ViewBag.Content</textarea><br />
    <input type="submit" style="width: auto; font-weight: 600;" value="Post" /><br />
</form>

This is similar to what we had previously. But it renders along with the previous data we had.

Screenshot (222)
Figure 4: HTML page showing the form to edit the previously updated post.

As you can see, the post contains the previous data, but also allows me to update the post. This is useful, in cases when you want to update the post. I am adding a new paragraph line, which would then be rendered as it is being written.

Tip: This is not WYSIWYG editor, just a plain-textarea. You should get a WYSIWYG editor if you want to be able to use the full power of HTML in your post.

Now, once I will submit this, it would get published as this version. Please revise the controller action,

if(Request.HttpMethod == "POST")
{
    // Post request method
    var title = Request.Form["title"].ToString();
    var tags = Request.Form["tags"].ToString().Split(new char[] { ',' }, StringSplitOptions.RemoveEmptyEntries);
    var content = Request.Form["content"].ToString();

    // Save content
    var post = new BlogPostModel { Title = title, CreateTime = DateTime.Now, Content = content, Tags = tags.ToList() };
    PostManager.Update(id, JsonConvert.SerializeObject(post));

    // Redirect
    Response.Redirect("~/blog");
 }

This demonstrates, how you will update the post. Once again, we are using PostManager, the object we created in our model to be able to perform the actions. The post is now updated, have a look at the revisit to the post preview. Screenshot (223).png
Figure 5: Updated post preview.

This now shows the updates being made. It is also clear as to how the new line is added to the post. Pretty simple it was, but I wanted to demonstrate the concept of this too.

Adding new posts

One more thing is, to add new posts. This is same, requires just a view. I am about to give you an overview of adding new posts, multiple posts and how does this preview them on the default page.

Screenshot (224).png
Figure 6: Creating a new blog post, second one.

This is similar, the only thing to understand is how is it rendered on the blog.

Screenshot (225).png
Figure 7: Two posts being previewed.

The thing that I wanted to share here, is that ASP.NET won’t automatically sort the posts, you would have to do that yourself. If you pay attention to the LINQ code, you will understand it.

// Just for sorting.
blogs = (from blog in blogs
         orderby blog.CreateTime descending
         select blog).ToList();

This would now sort the blogs, a descending order. That is why, “Two posts” shows above, whereas in the JSON data it would come after the “First blog post!” But we have now sorted the list as per our requirements.

Heading over to Windows 10 application and Web API

Before I actually head over, I want to make a final post, that would be read in the application! Please see the following image, then we continue to the next section.

Screenshot (226).png
Figure 8: Final post online.

Web interface has been discussed enough, the next sections will talk about the Web API and Windows 10 application programming.

Further reading:

If you want to get more in-depth information, please read the following documents and articles.

  1. A tip for ajax developers in ASP.NET MVC framework
  2. Getting Started with LINQ in C#

Web API and Windows 10 client application

In this section, I will first talk about the ASP.NET Web API and then I will build the application to consume the API and show the blogs. In the client application, we do not need any functions, like create, update etc. We just consume and display the data, so the client application won’t have enough functions but it would display the content.

Building the API

Actually, the API is simple and does not need anything to be done! The application has already been completed, so our API would only redirect to the application and load the data from the model and return it. API does not need to have any HTML data or CSS stylesheets, instead API just returns the data in JSON or XML format. I personally recommend and always will recommend using JSON. XML is a very heavy format and is also not efficient. JSON is much simple, lightweight and portable format!

The API is just a controller, with the same actions that we need and a return-type. Since we do not need any functions but C (from CRUD), I defined the API to be as simple as,

using Newtonsoft.Json;
using PersonalBlogTemplateWithServices.Models;
using System;
using System.Collections.Generic;
using System.Linq;
using System.Net;
using System.Net.Http;
using System.Web.Http;

namespace PersonalBlogTemplateWithServices.Controllers
{
    public class BlogApiController : ApiController
    {
        // In this controller, we just need the Read functions. Nothing else!
        // We do not need the clients to be able to write or update the blogs... Just read them

        [HttpGet]
        [Route("blog/api")]
        public List<BlogPostModel> Get()
        {
            return PostManager.Read();
        }
    }
}

Small, but enough.This would let us consume the API from our client application. There is also no need to edit the API configuration, because I have provided the Routing scheme to the function.

[Route("blog/api")]

This would automatically get routed to this URL. The rest of the functionality is to be provided by the application.

One thing to note, is that this function again, reads the data from the model and returns is, as a collection. This would then be translated as JSON data later. So our application will be able to use the JSON converters to get the data from the API and render it on the application.

I hope things for API are clear upto this stage! If not, please re-read. I think the post is pretty much simple. 🙂

Building the client application; Windows 10 application

Great, until now you have learnt how to build the online blog, that has a web interface and an API interface. I will continue with the next post, to teach you how to consume the API, the post has gone way more than I was expecting (it overwent 4k words).

Read the above article and leave your feedback, I would love to hear it!

Points of interest

Thank you for reading the post, I have shared a common, yet easy and simple way to build your own blog. The post contains the information that you may need to have to create your own online personal blog. I have not shared any third-party library because I want you to be able to add your own. The blog is built on top of native ASP.NET frameworks.

In a later post, I will also share the common concepts for building the data sources, so that the only dependency of “Newtonsoft.Json” would also be removed from this project. Until then, please bear with me.

One more thing, the text editor used is plain-textarea, you can replace it with your favorite WYSIWYG editor to be able to use the power of HTML, then render the HTML on the screen.

In coming days, I will write two more posts:

  1. Consuming the Web API from Windows 10 application.
  2. Building your own custom data sources.

Stay tuned for more of such content! 🙂